This article explains how to display your data from Microsoft Forms responses in an Awesome Table app, and how to share your form.
1. Create your Microsoft Form
If you own a Microsoft 0365 account, we recommend to create a Form directly from Sharepoint or OneDrive.
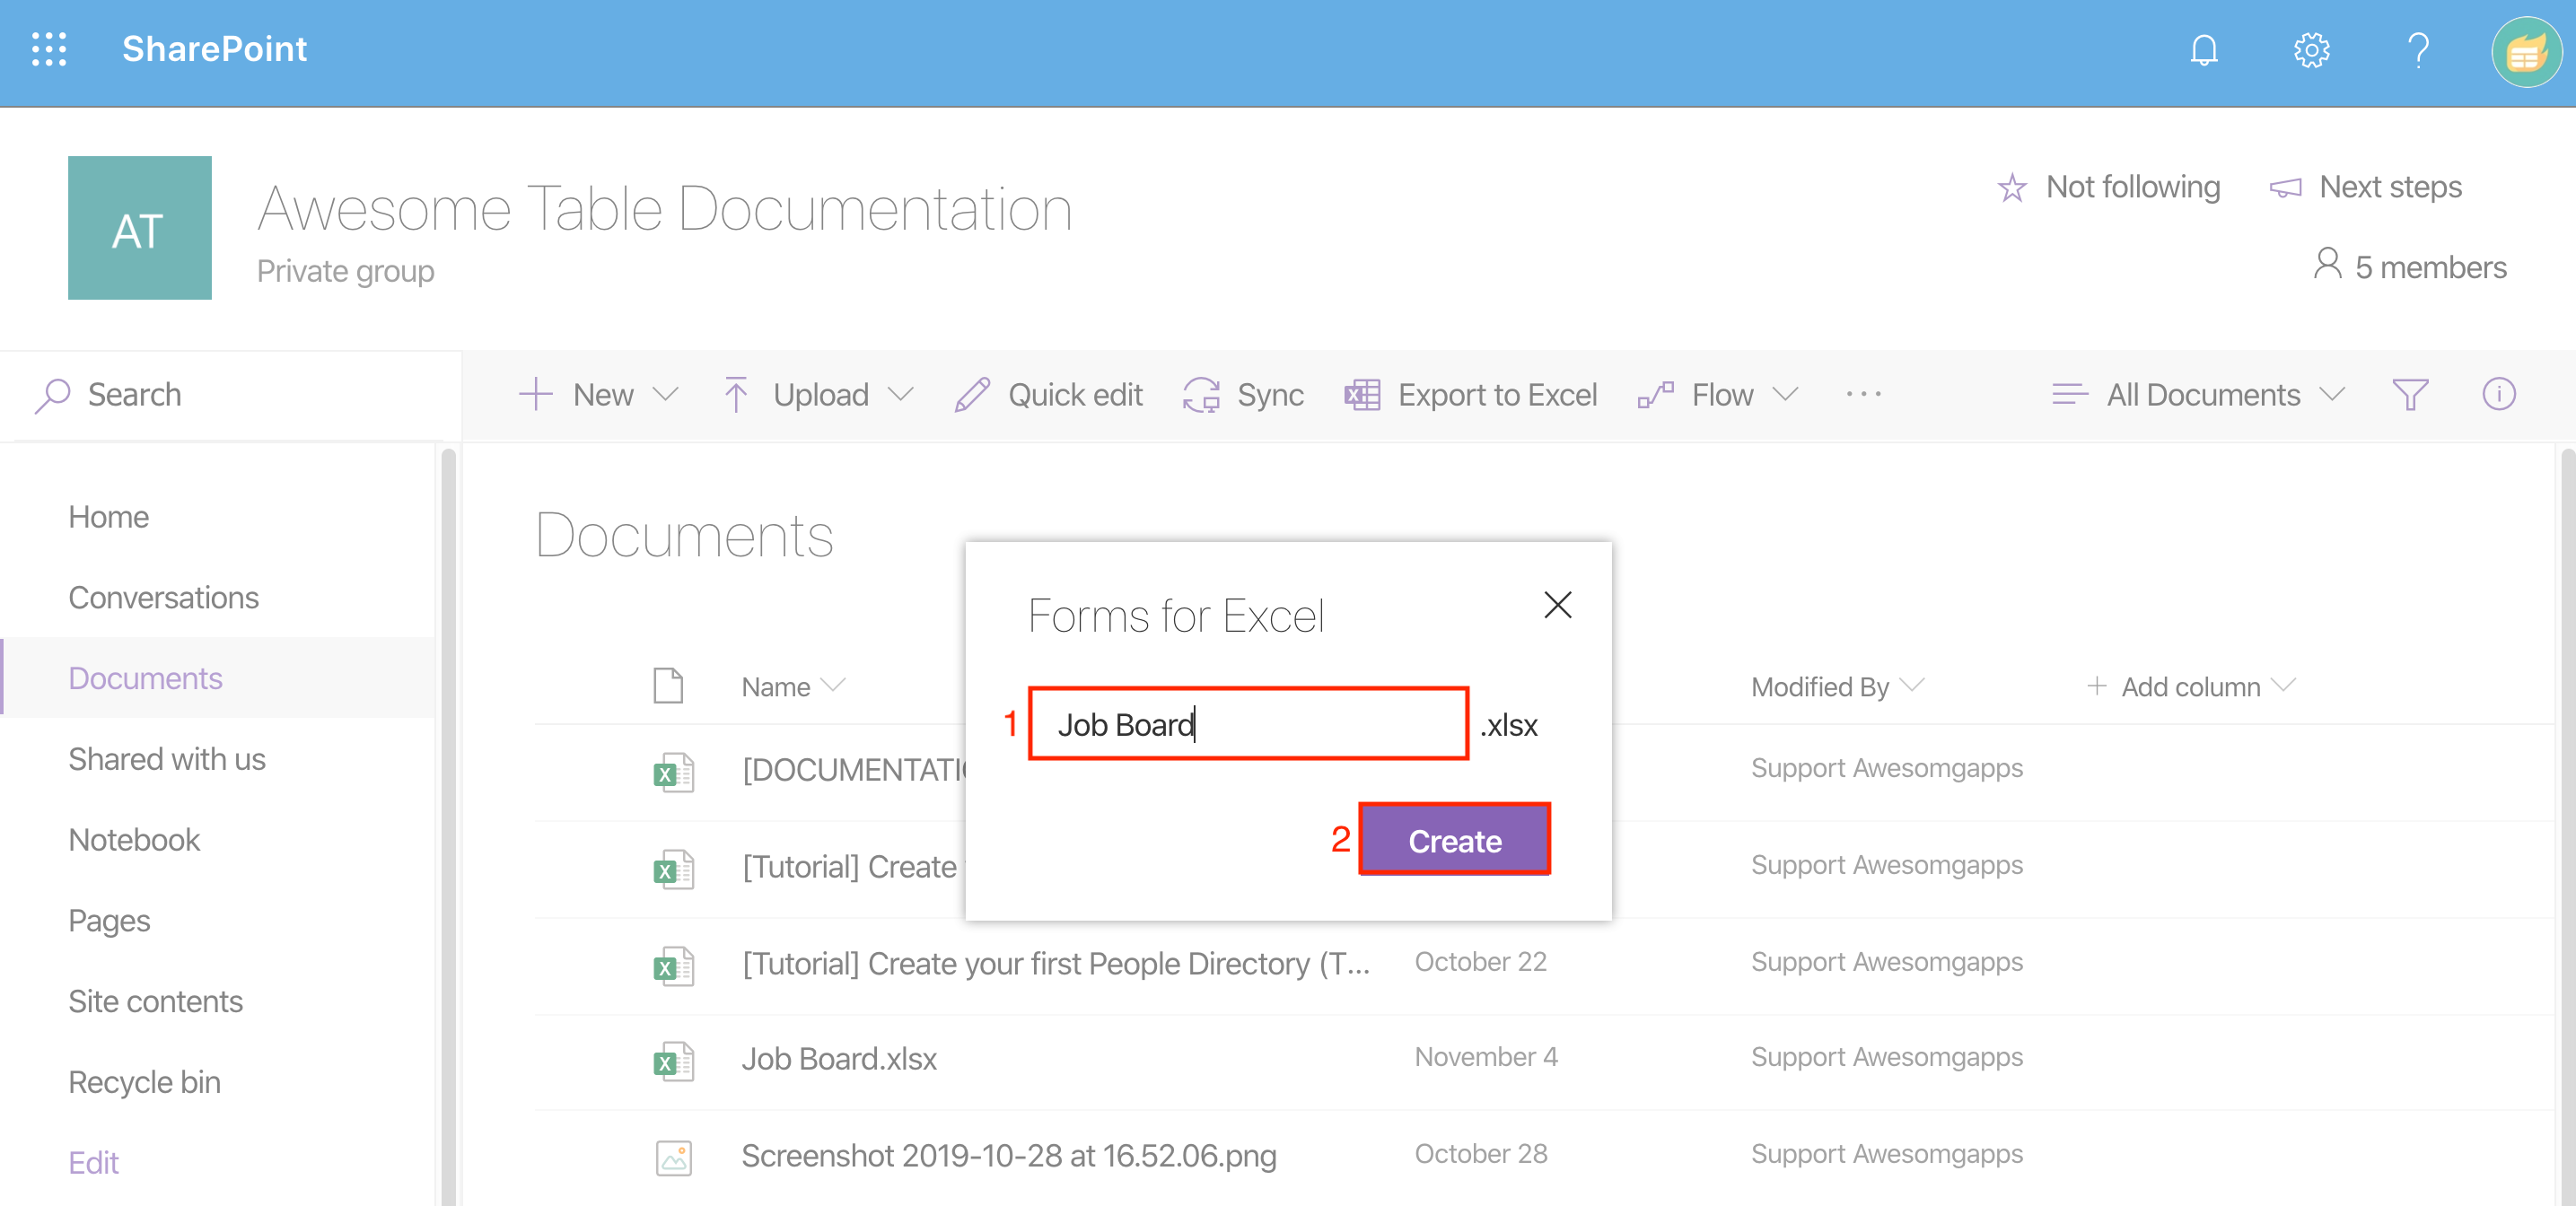
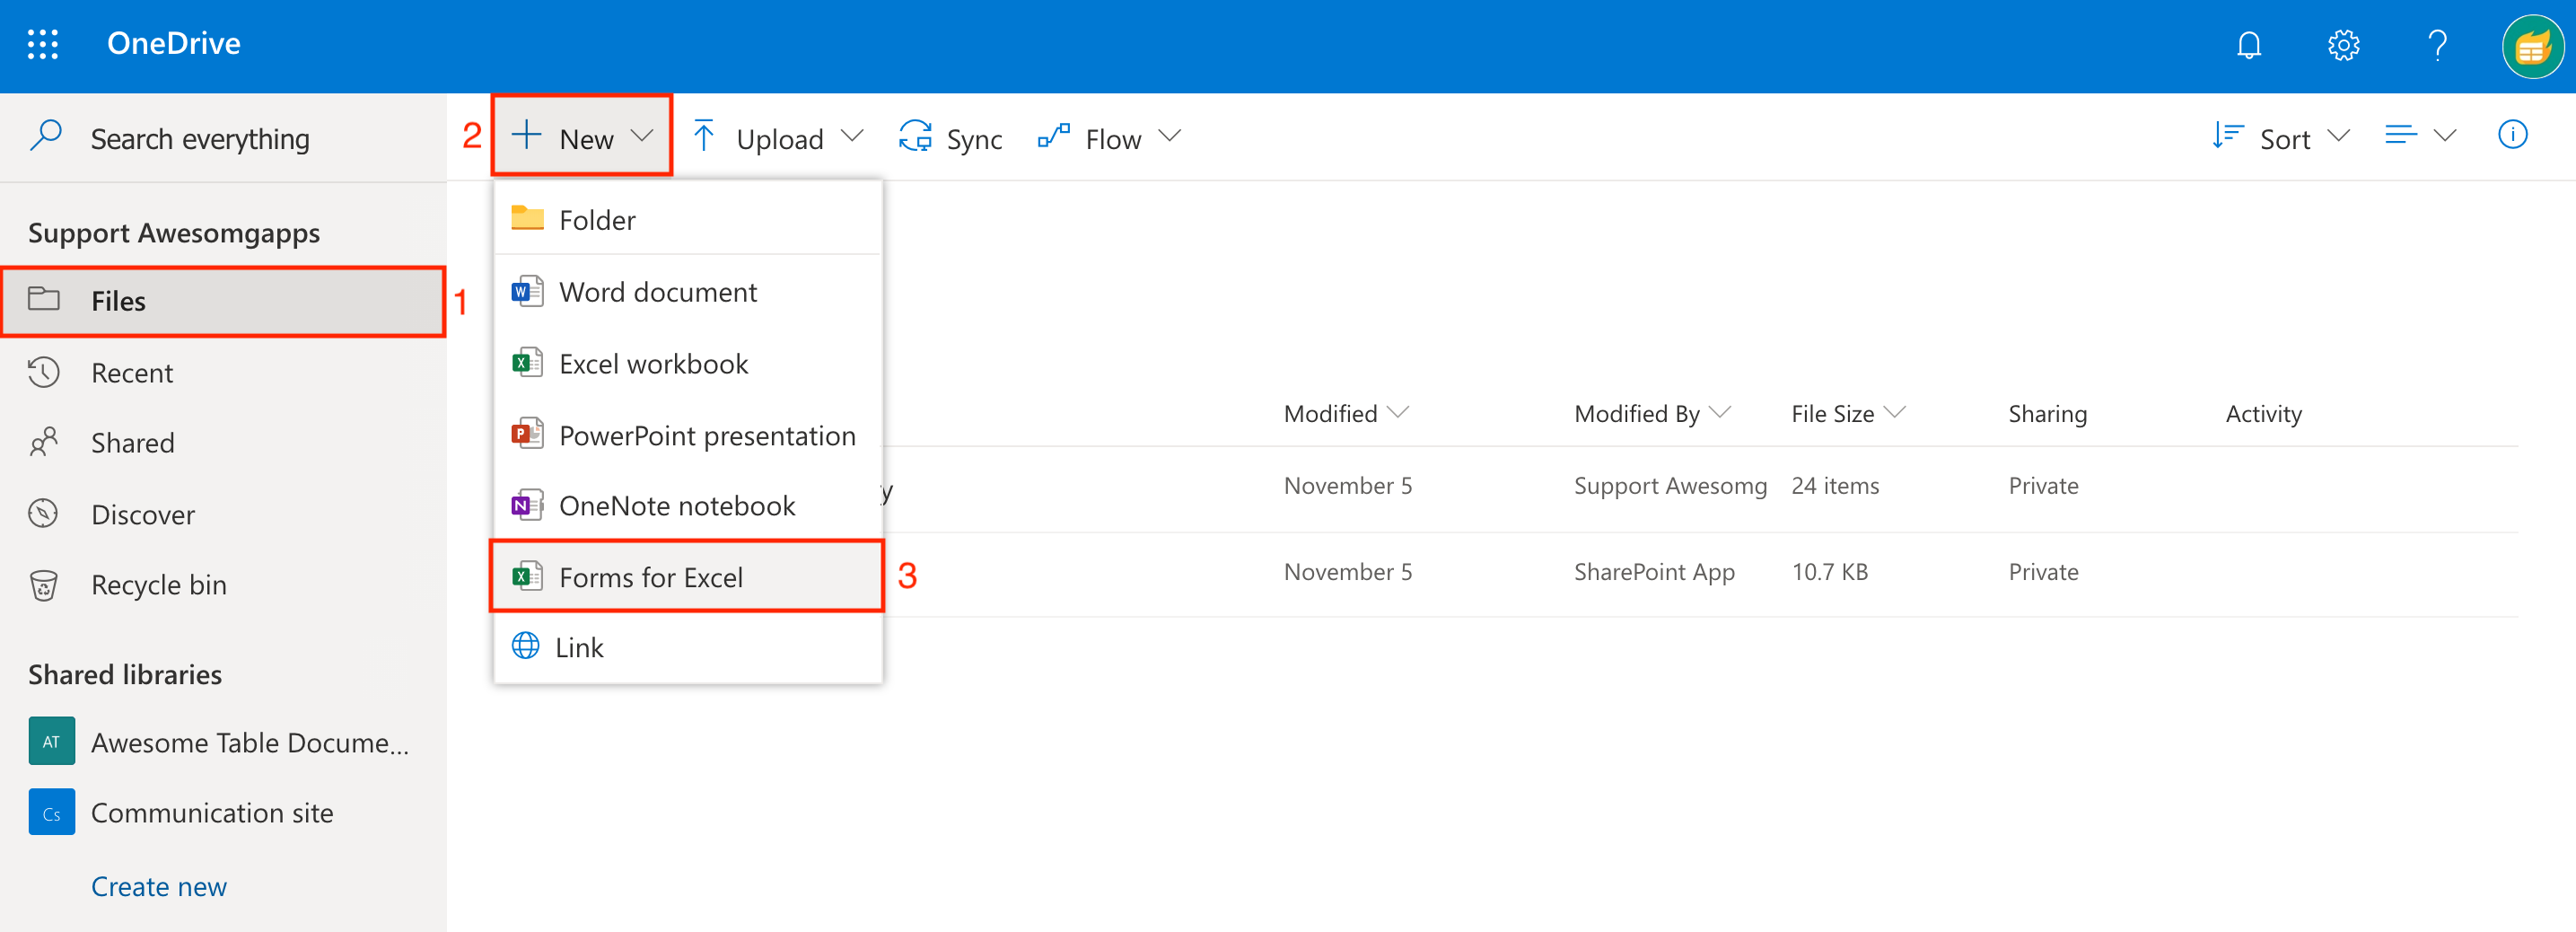
1. In your SharePoint, click Documents > New > Forms for Excel:

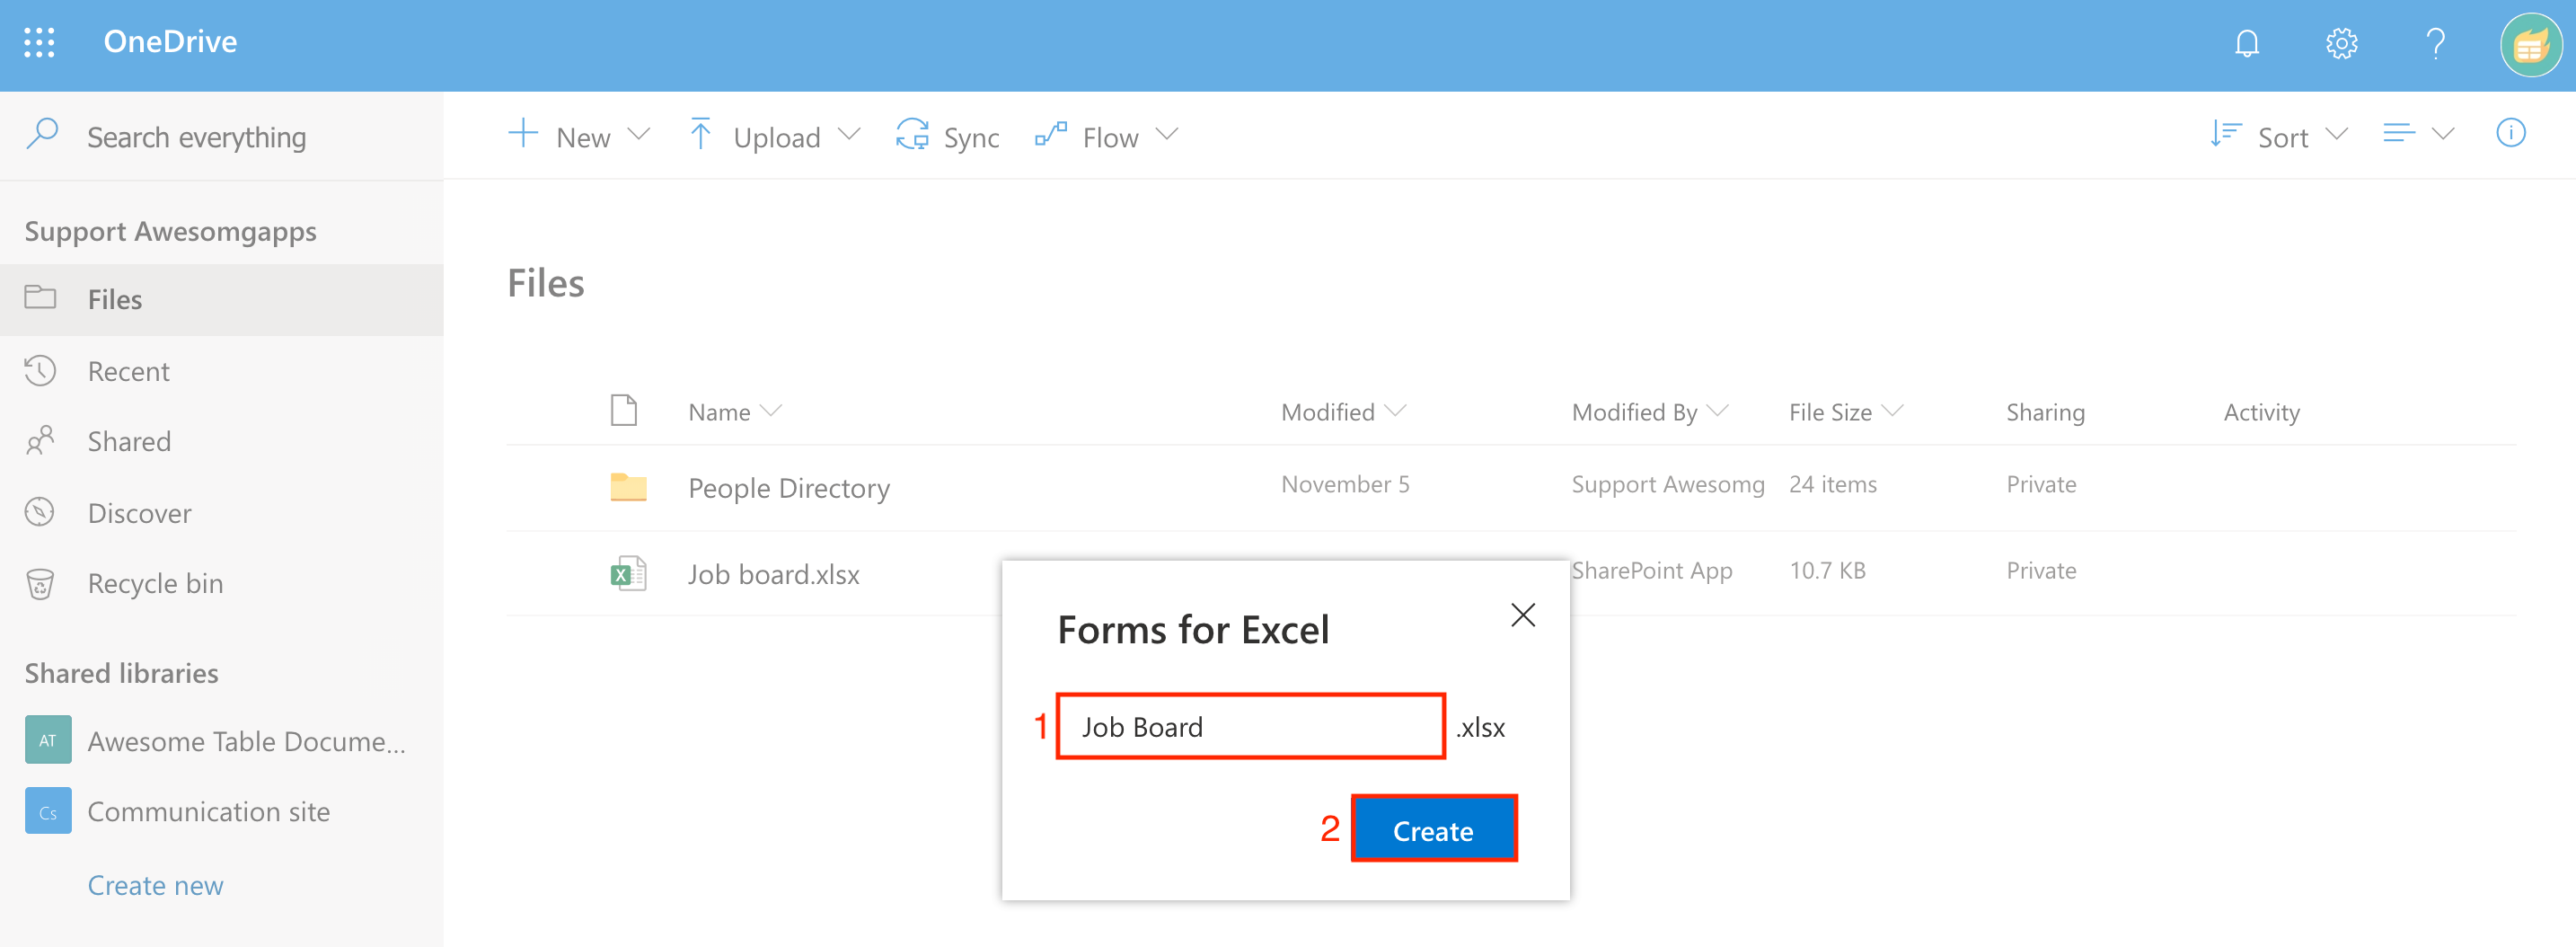
2. Enter a name for your Form (i.e: Job Board) > click Create:
A new window opens.
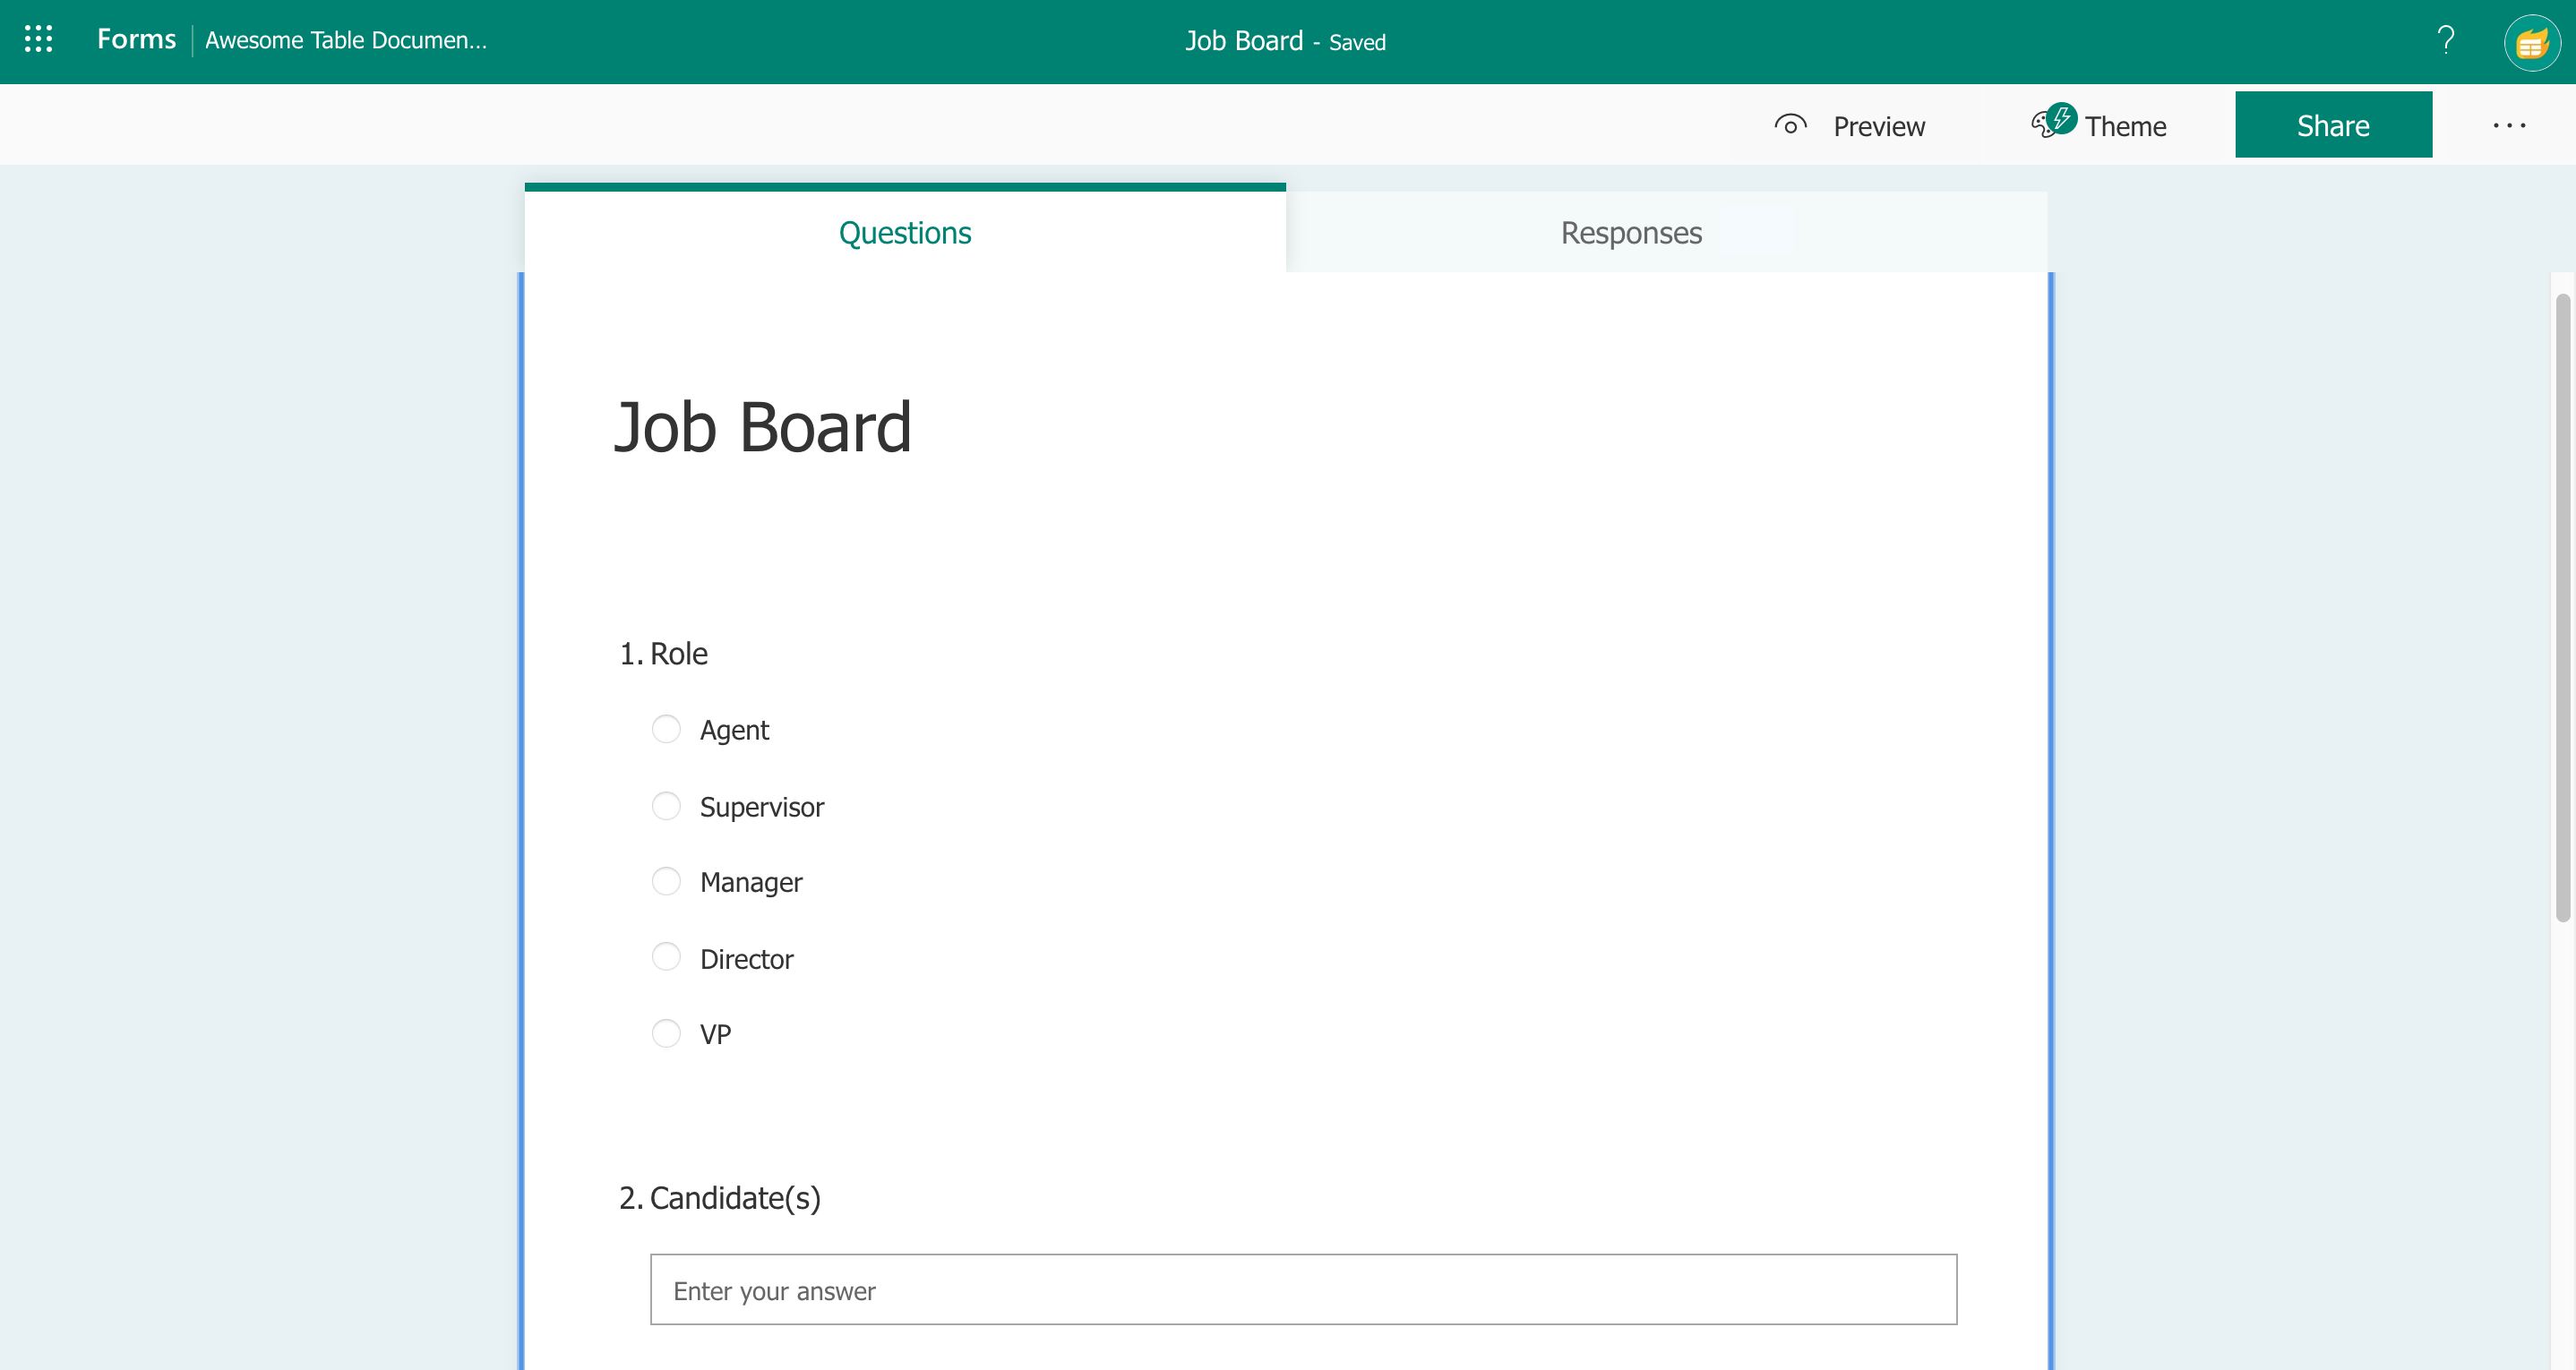
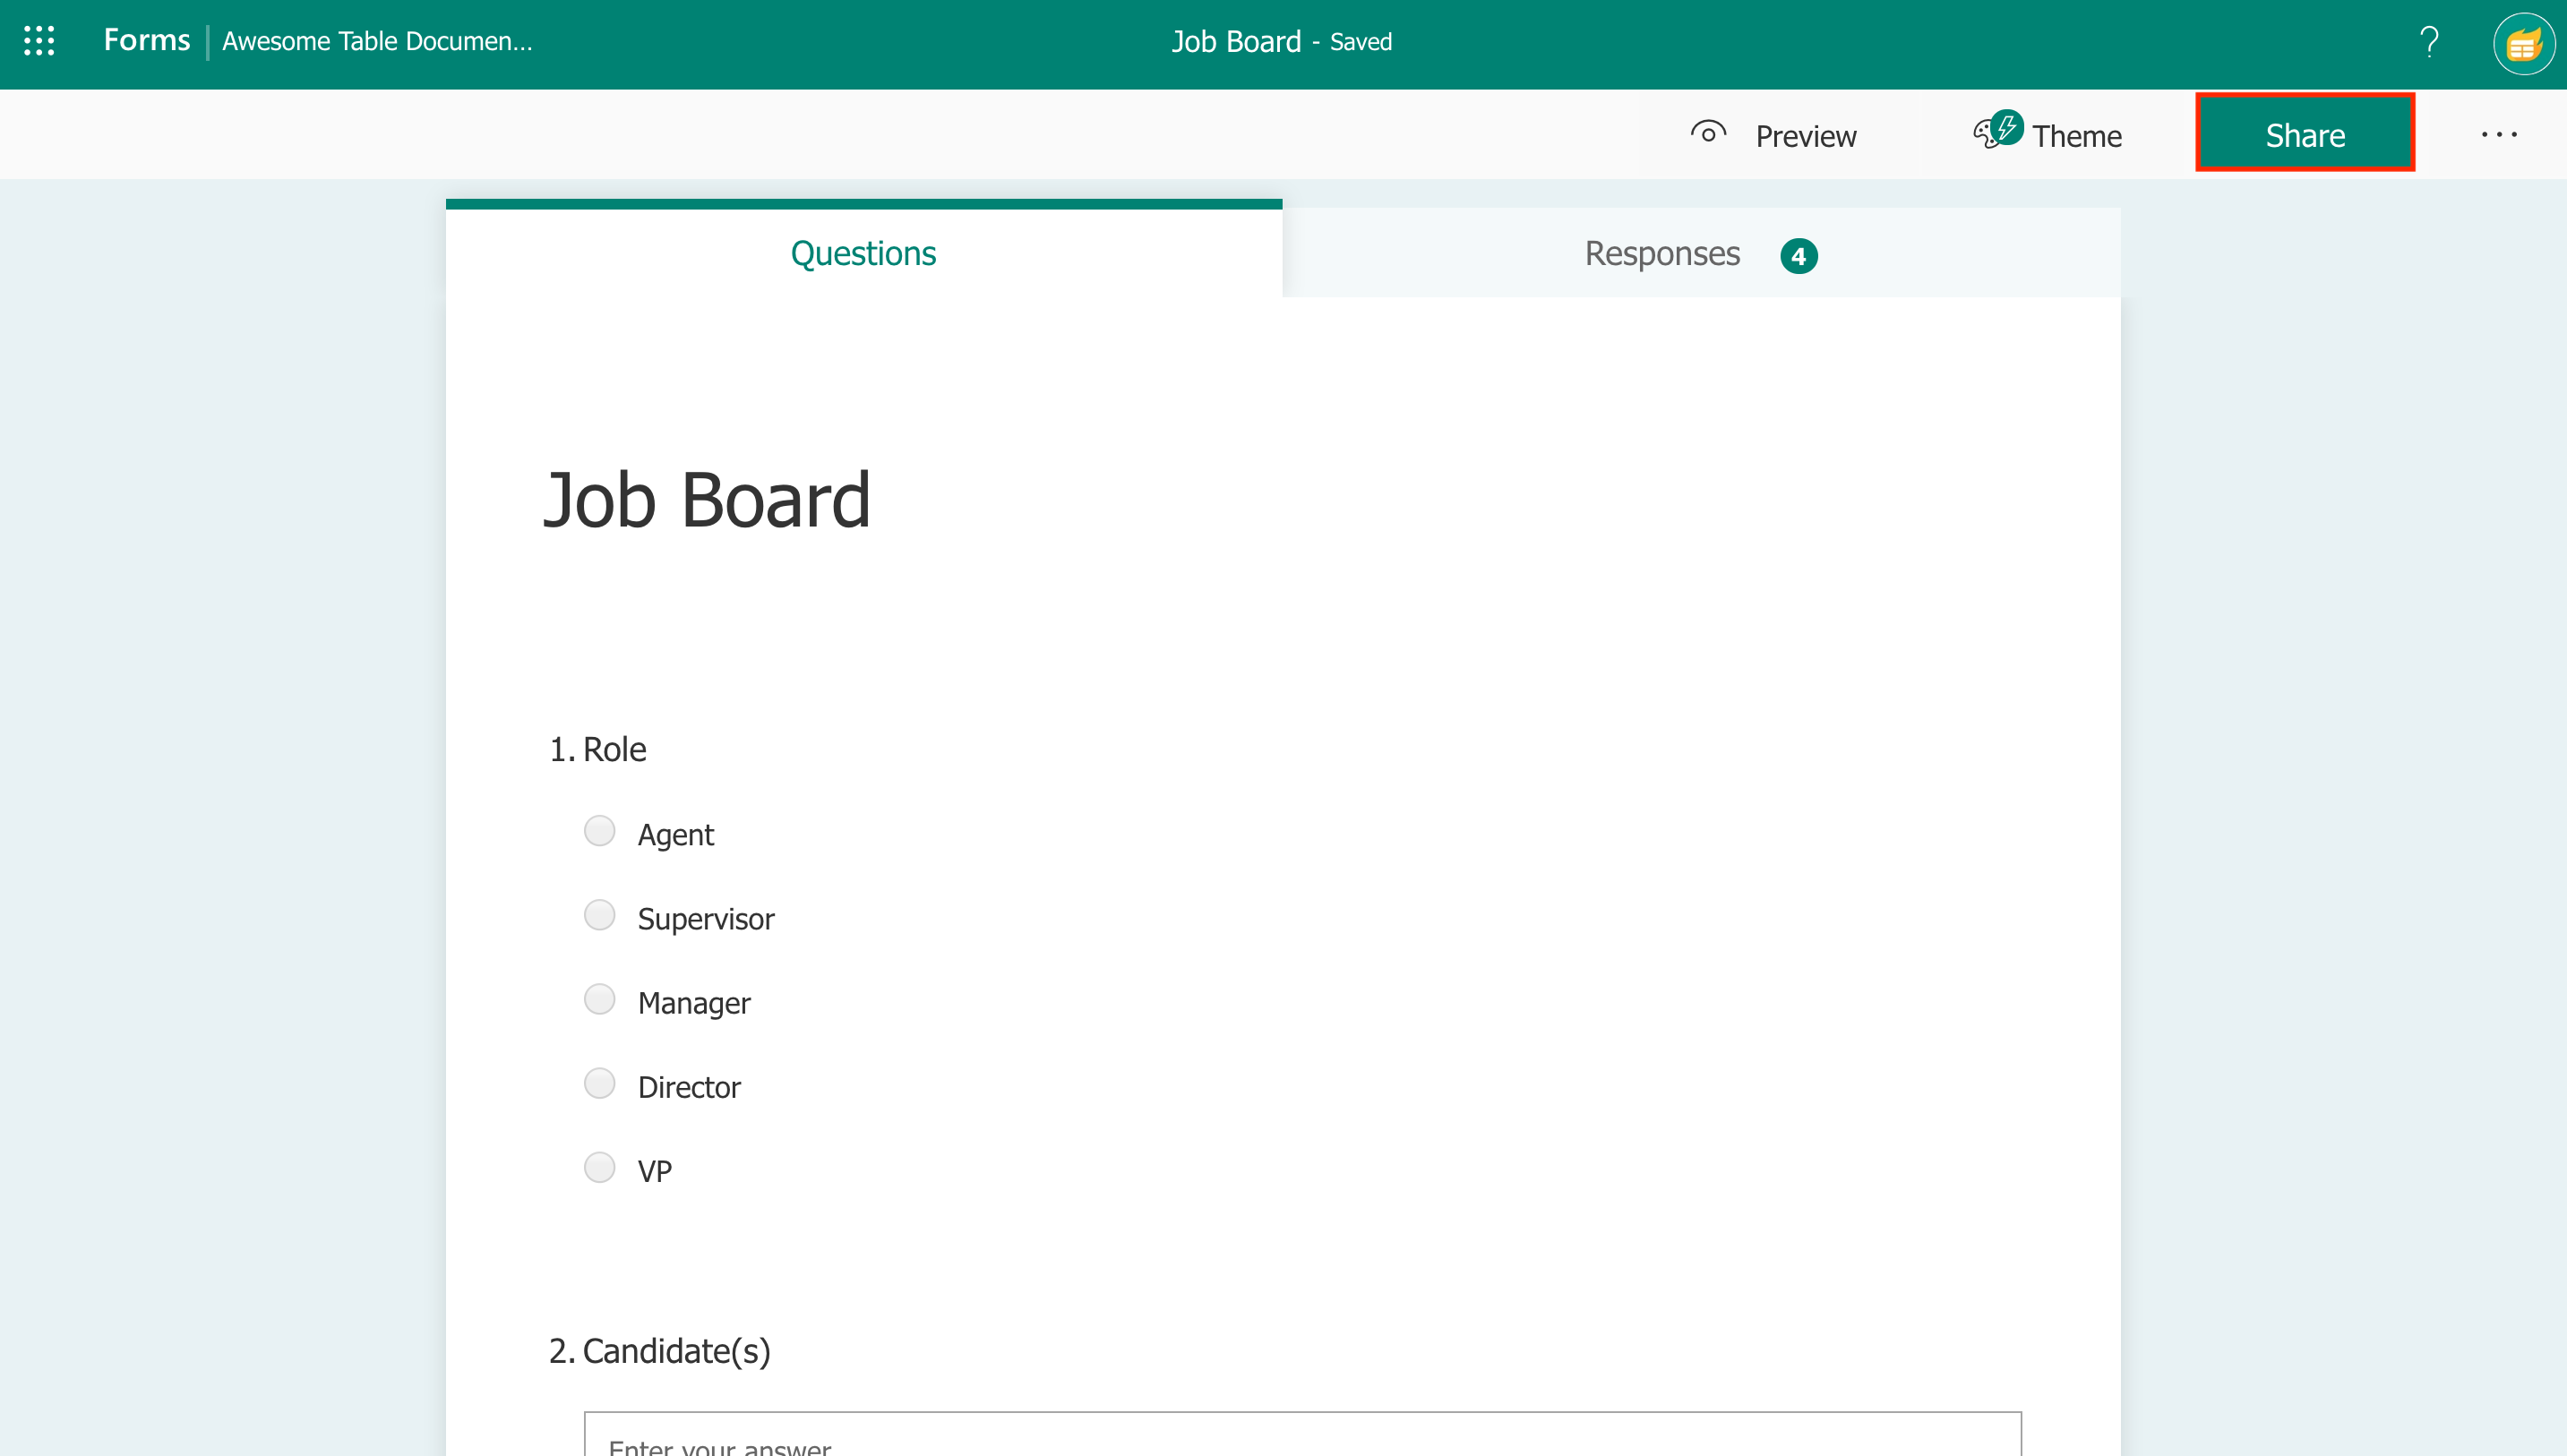
3. Add questions to your Form:

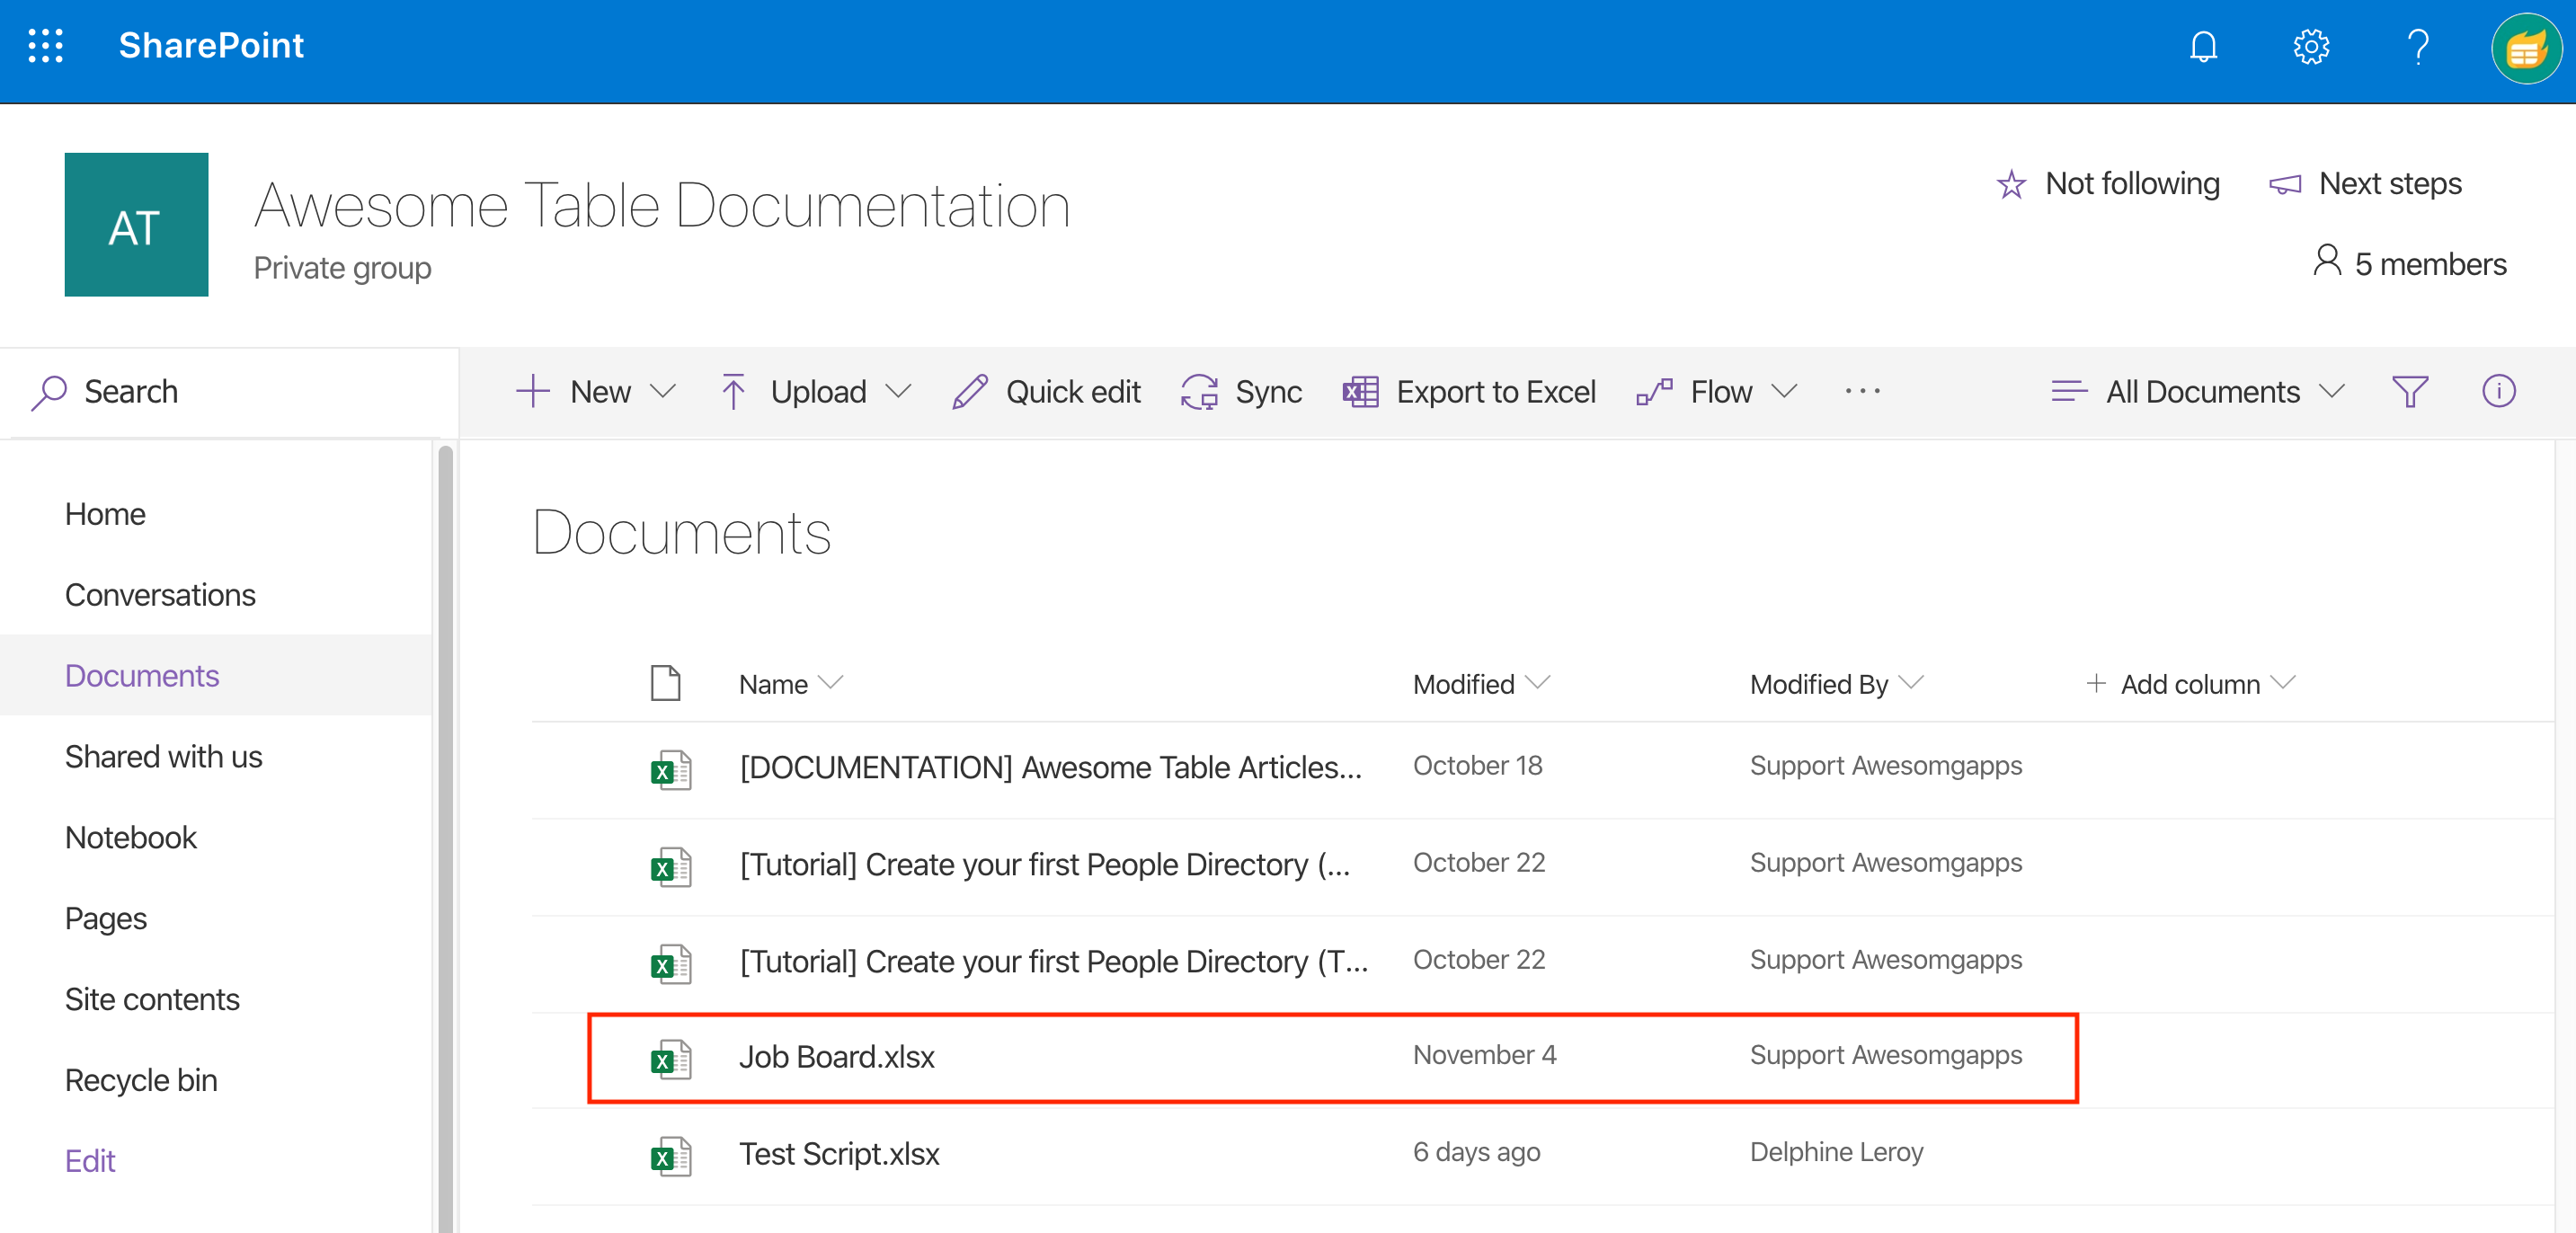
If you go back to your SharePoint Documents, you will notice a newly created Excel file which automatically collects all your Form responses:
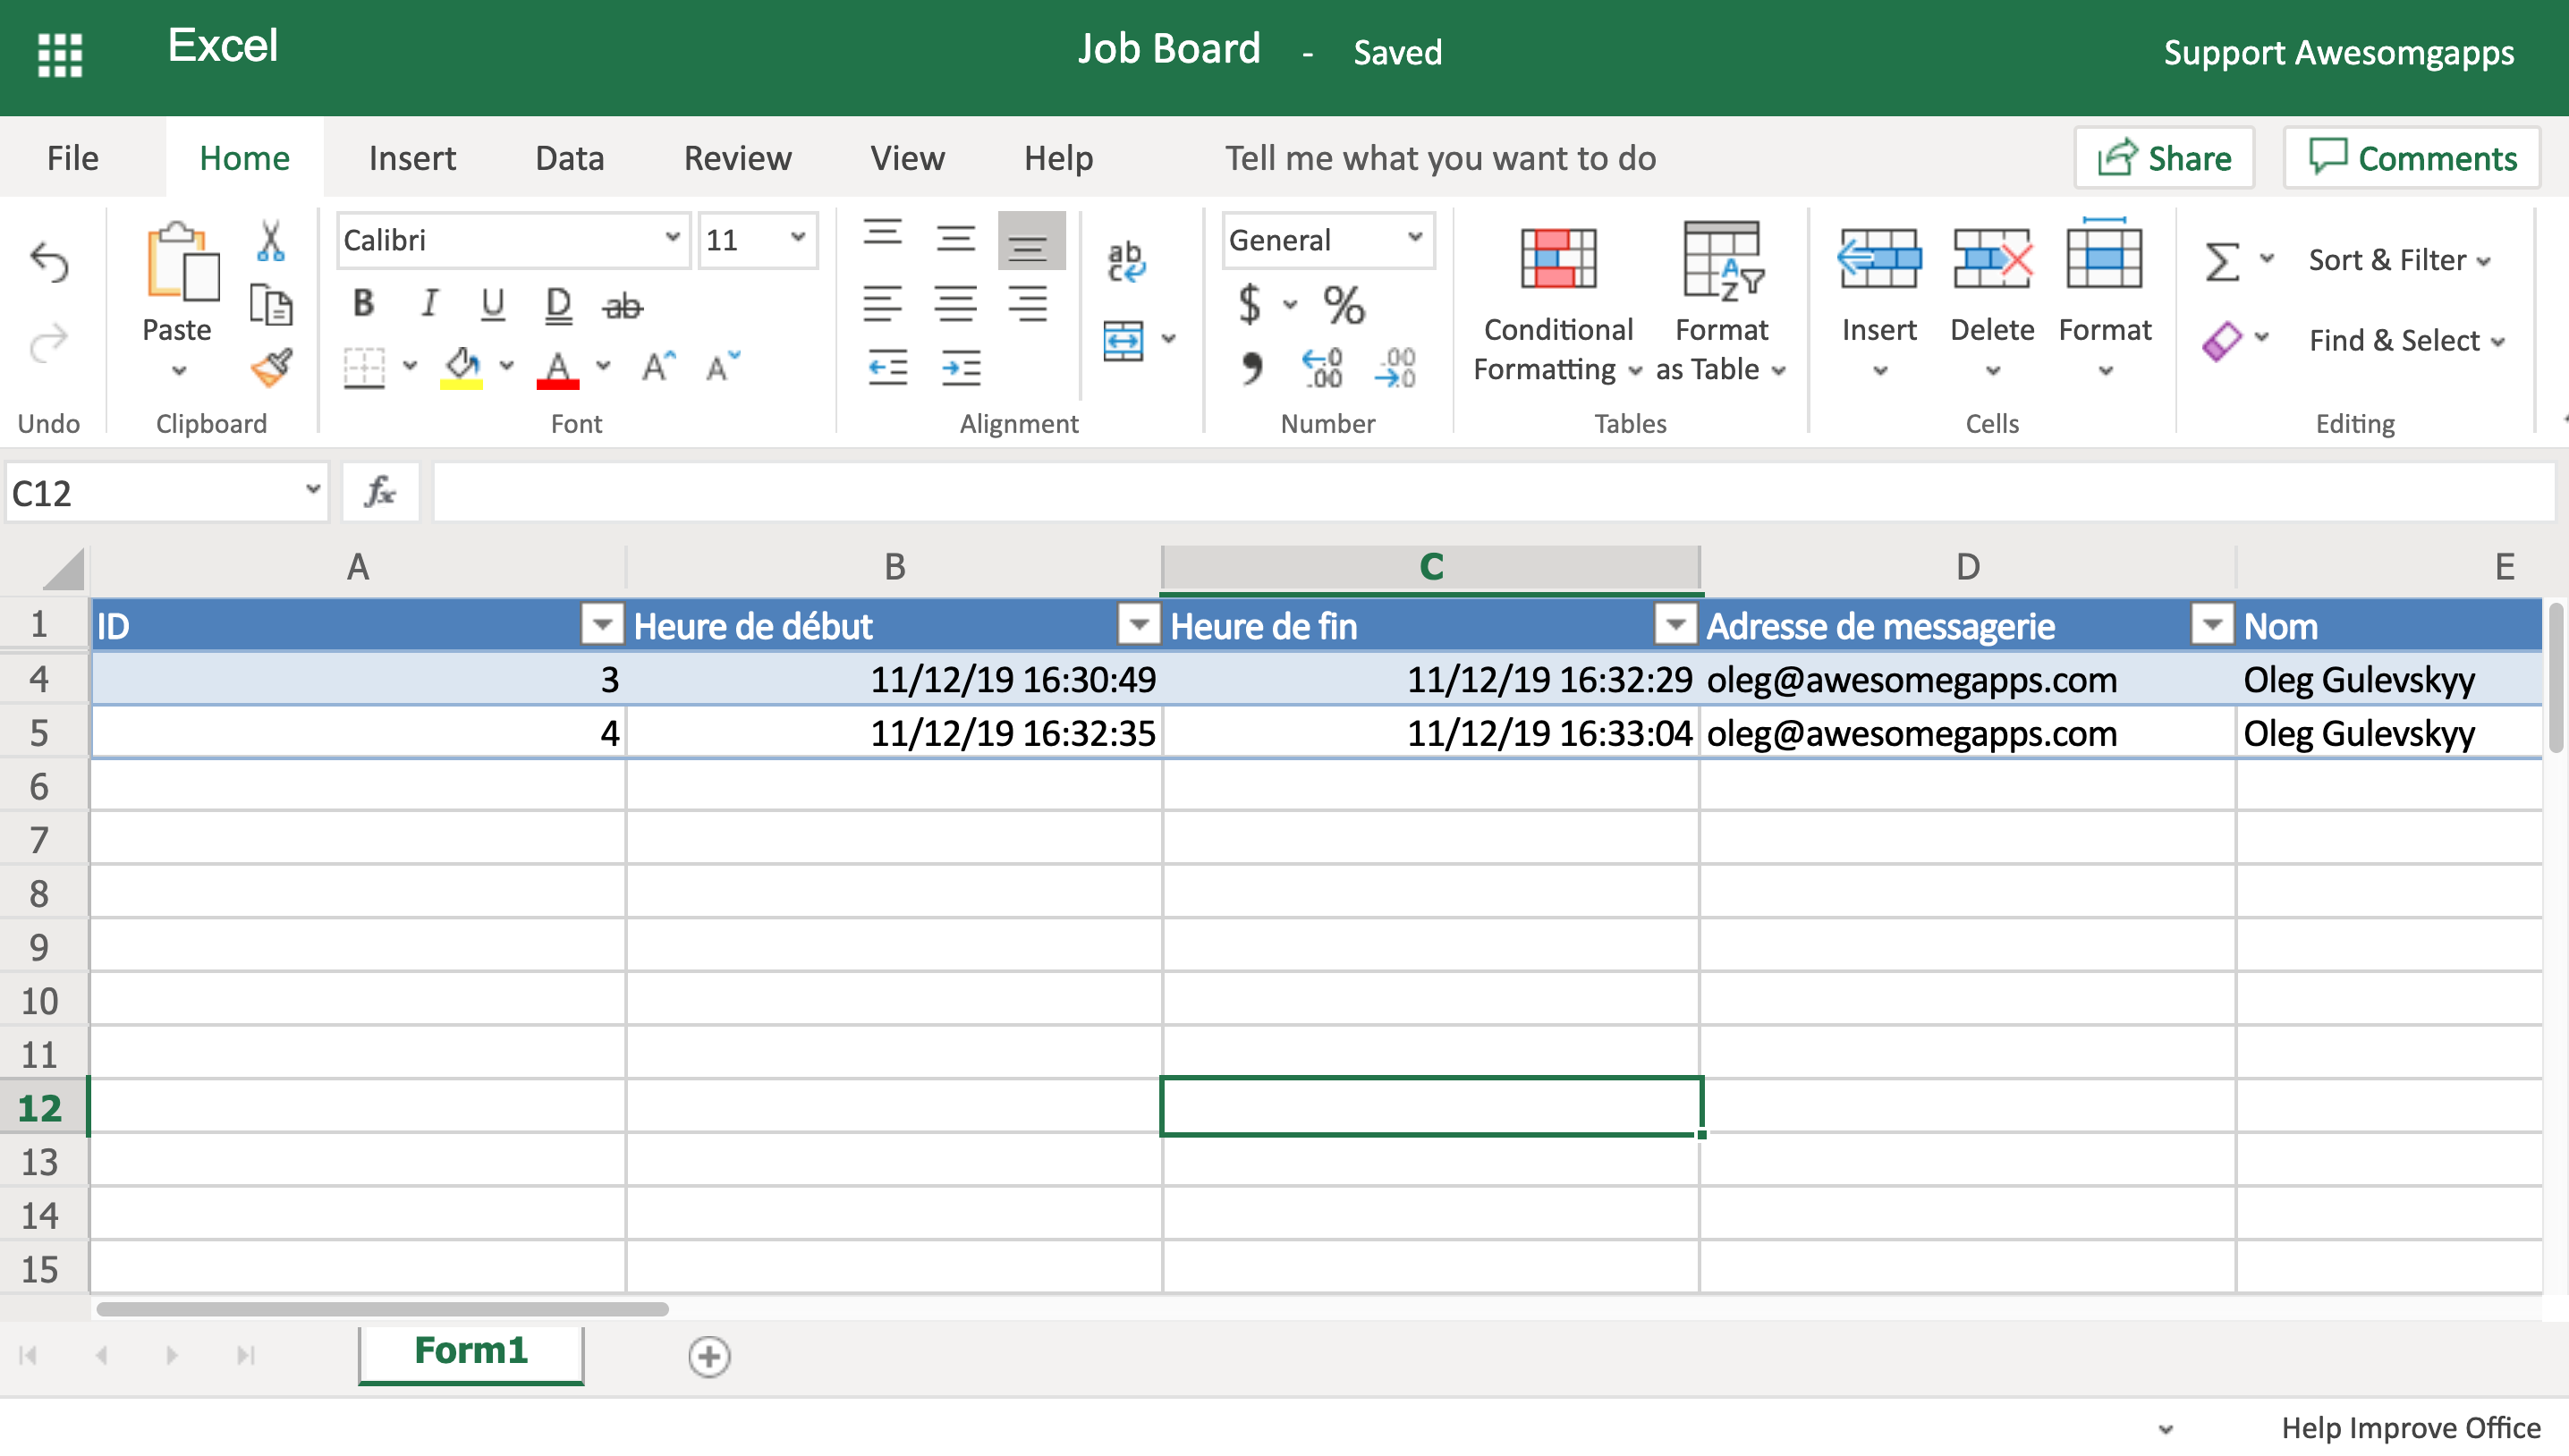
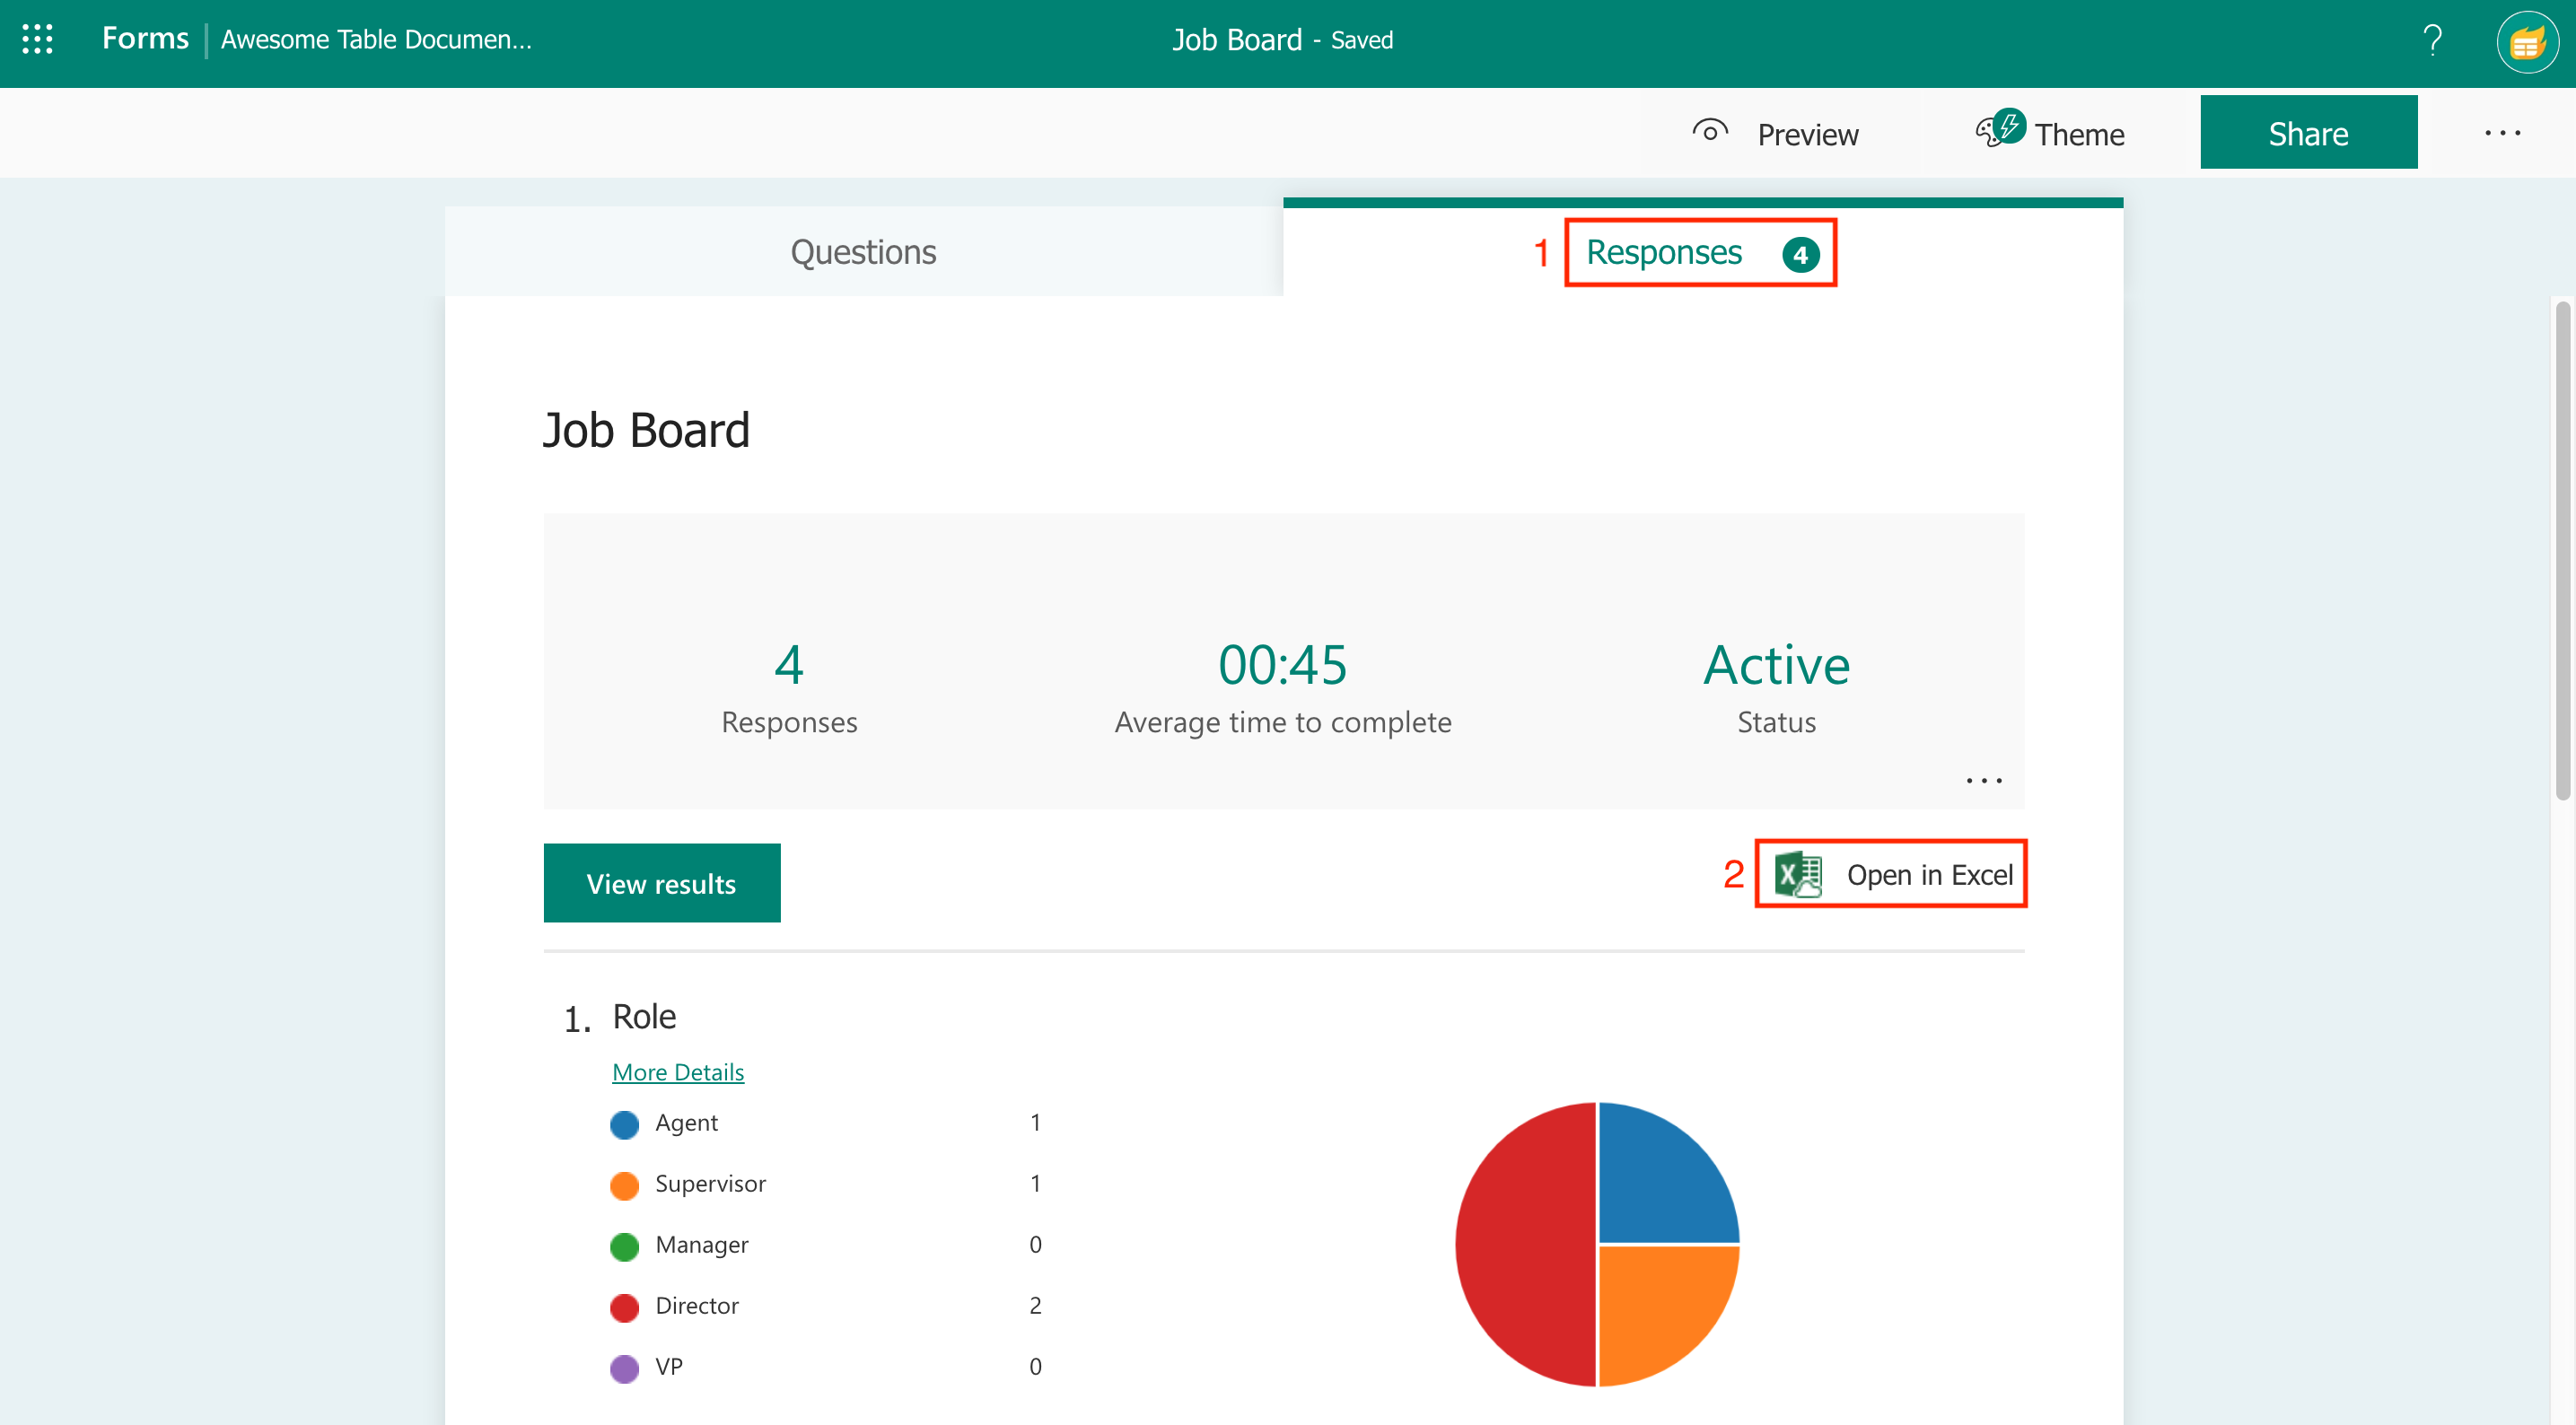
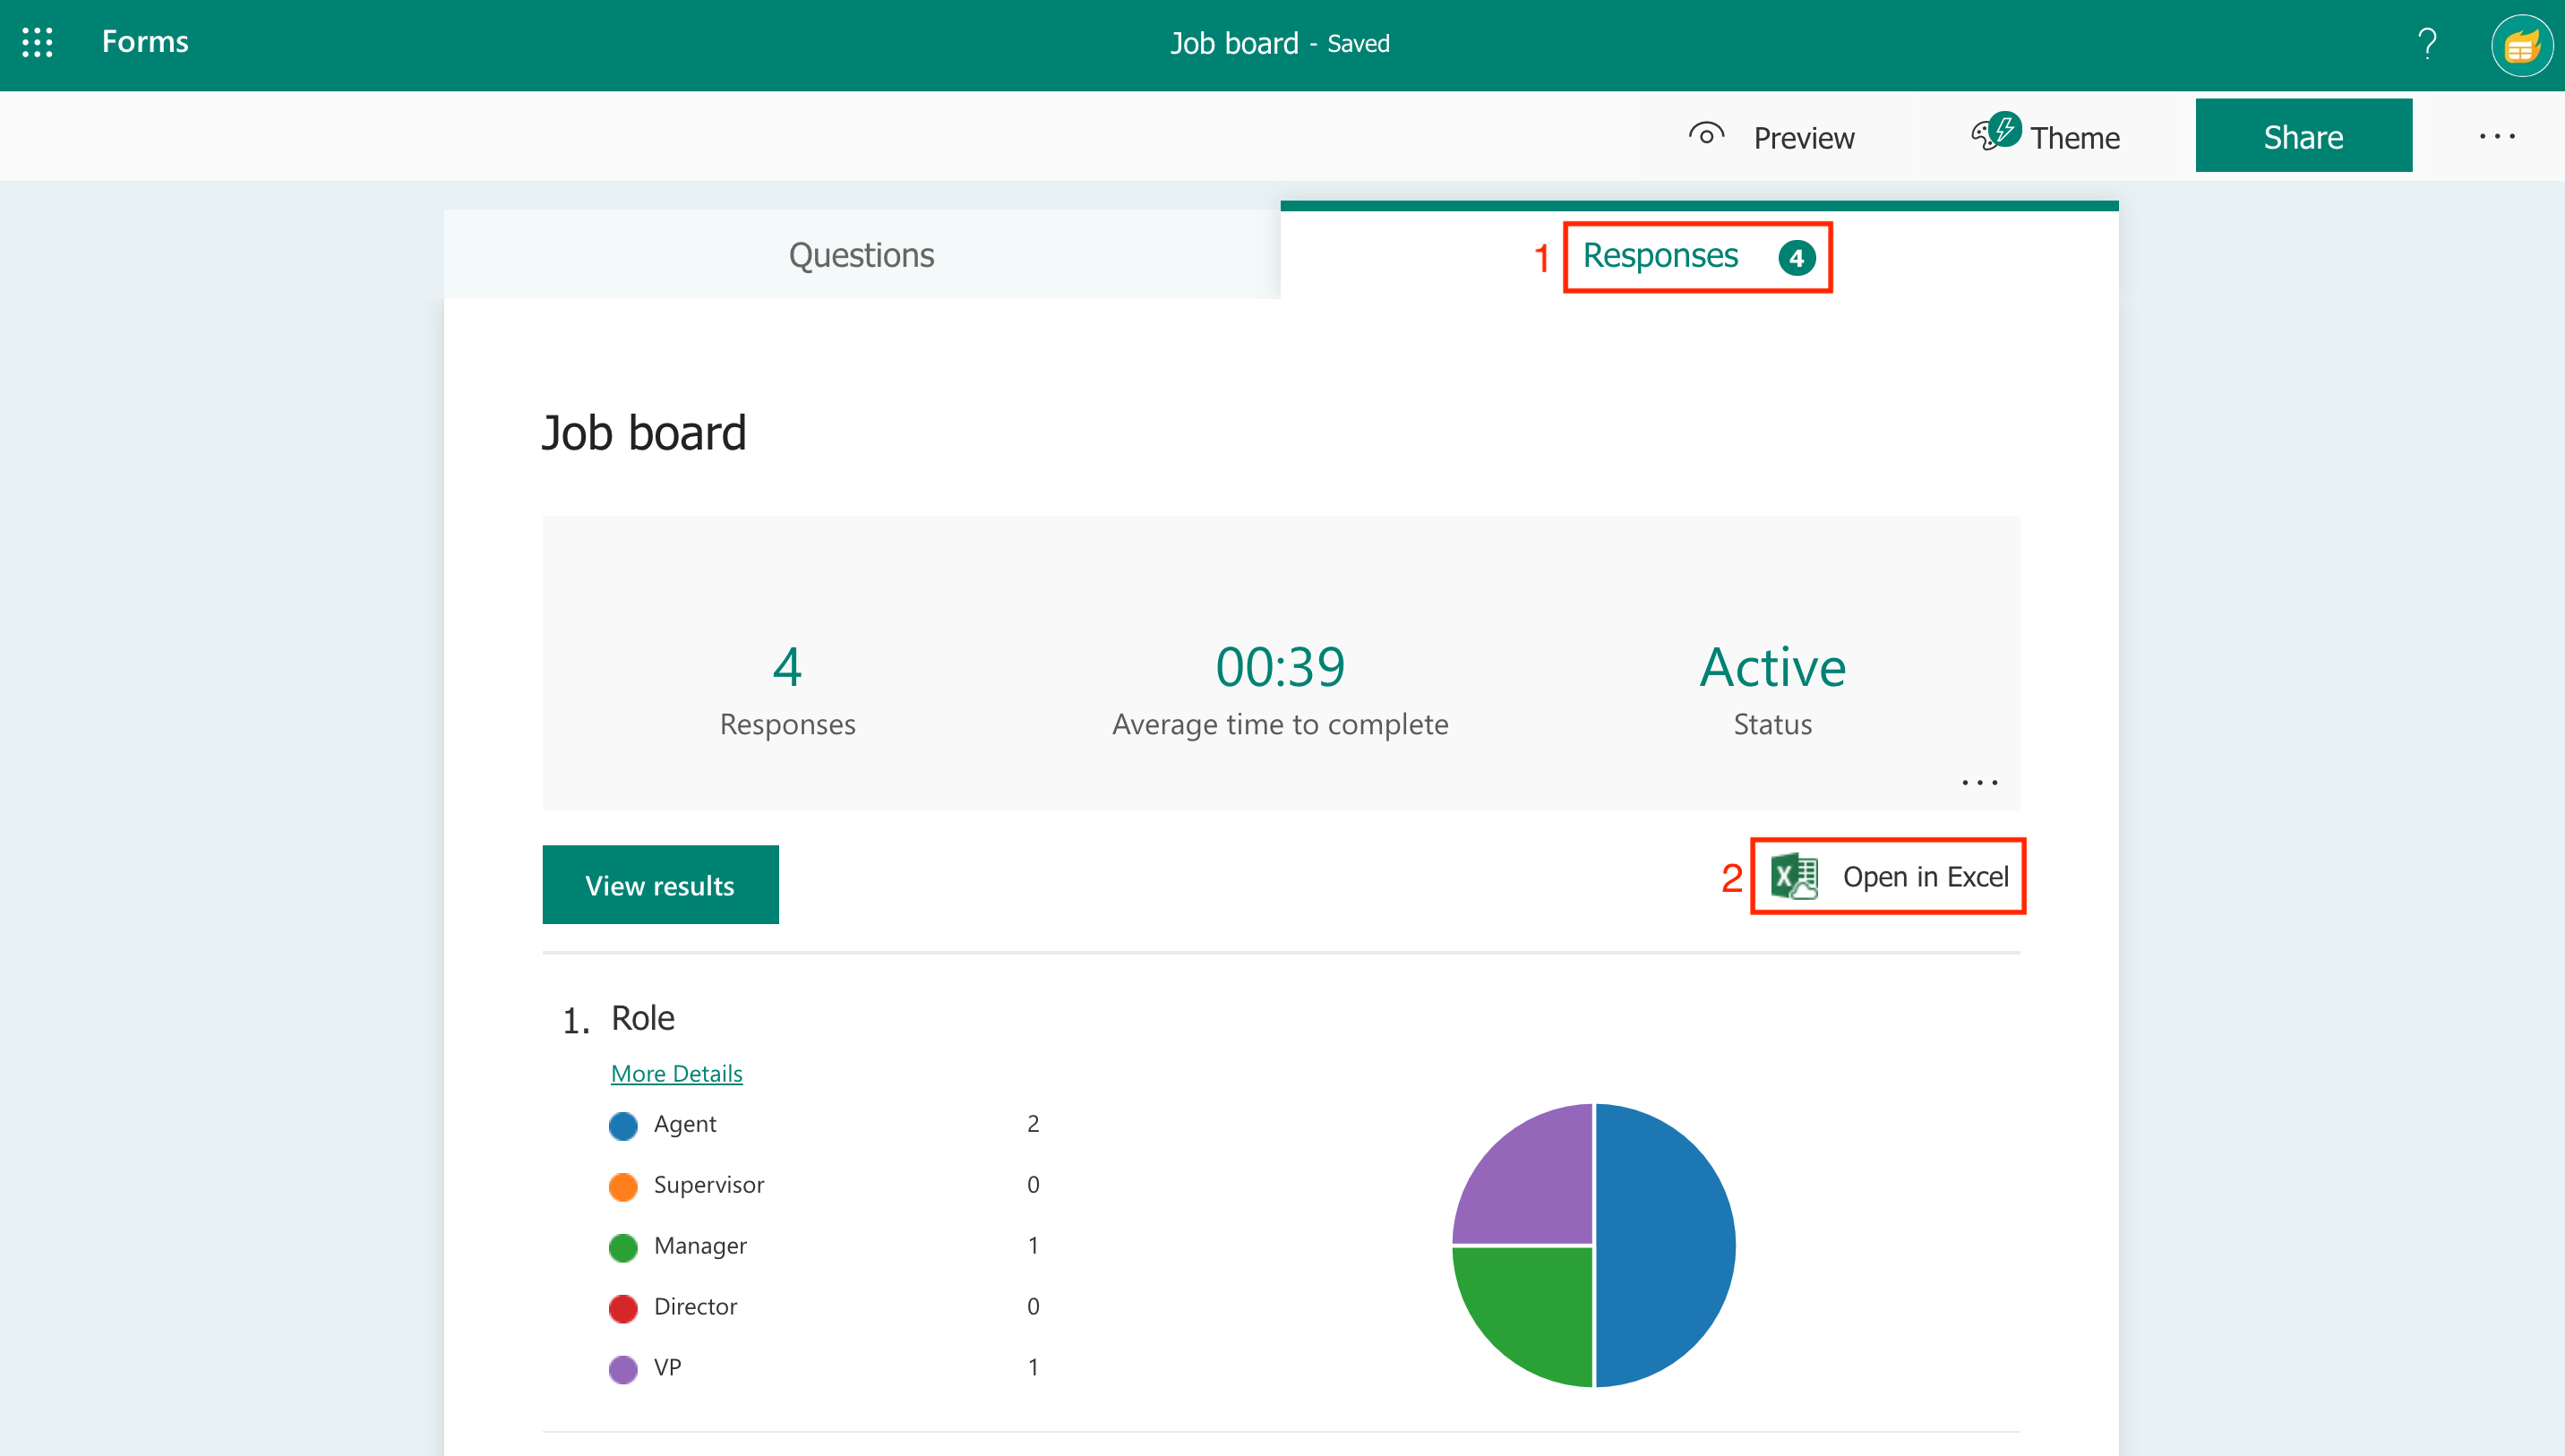
4. To retrieve the responses on an Excel file, go to your form. Click Responses > Open in Excel:
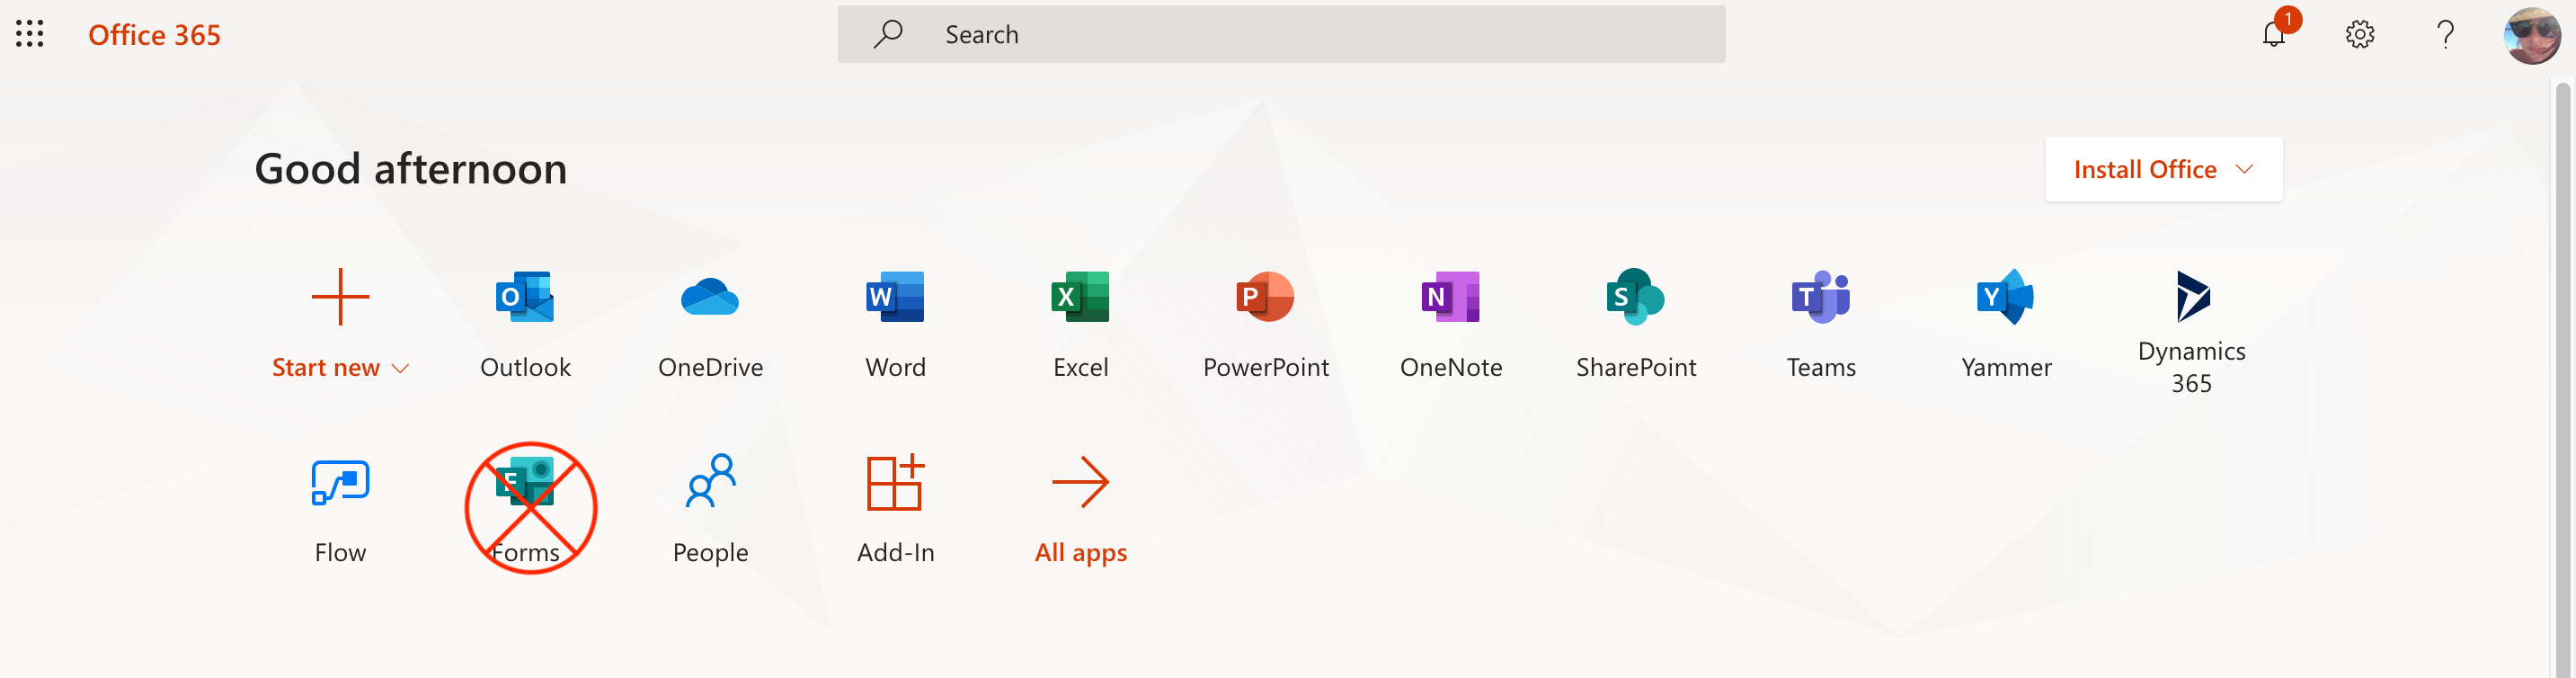
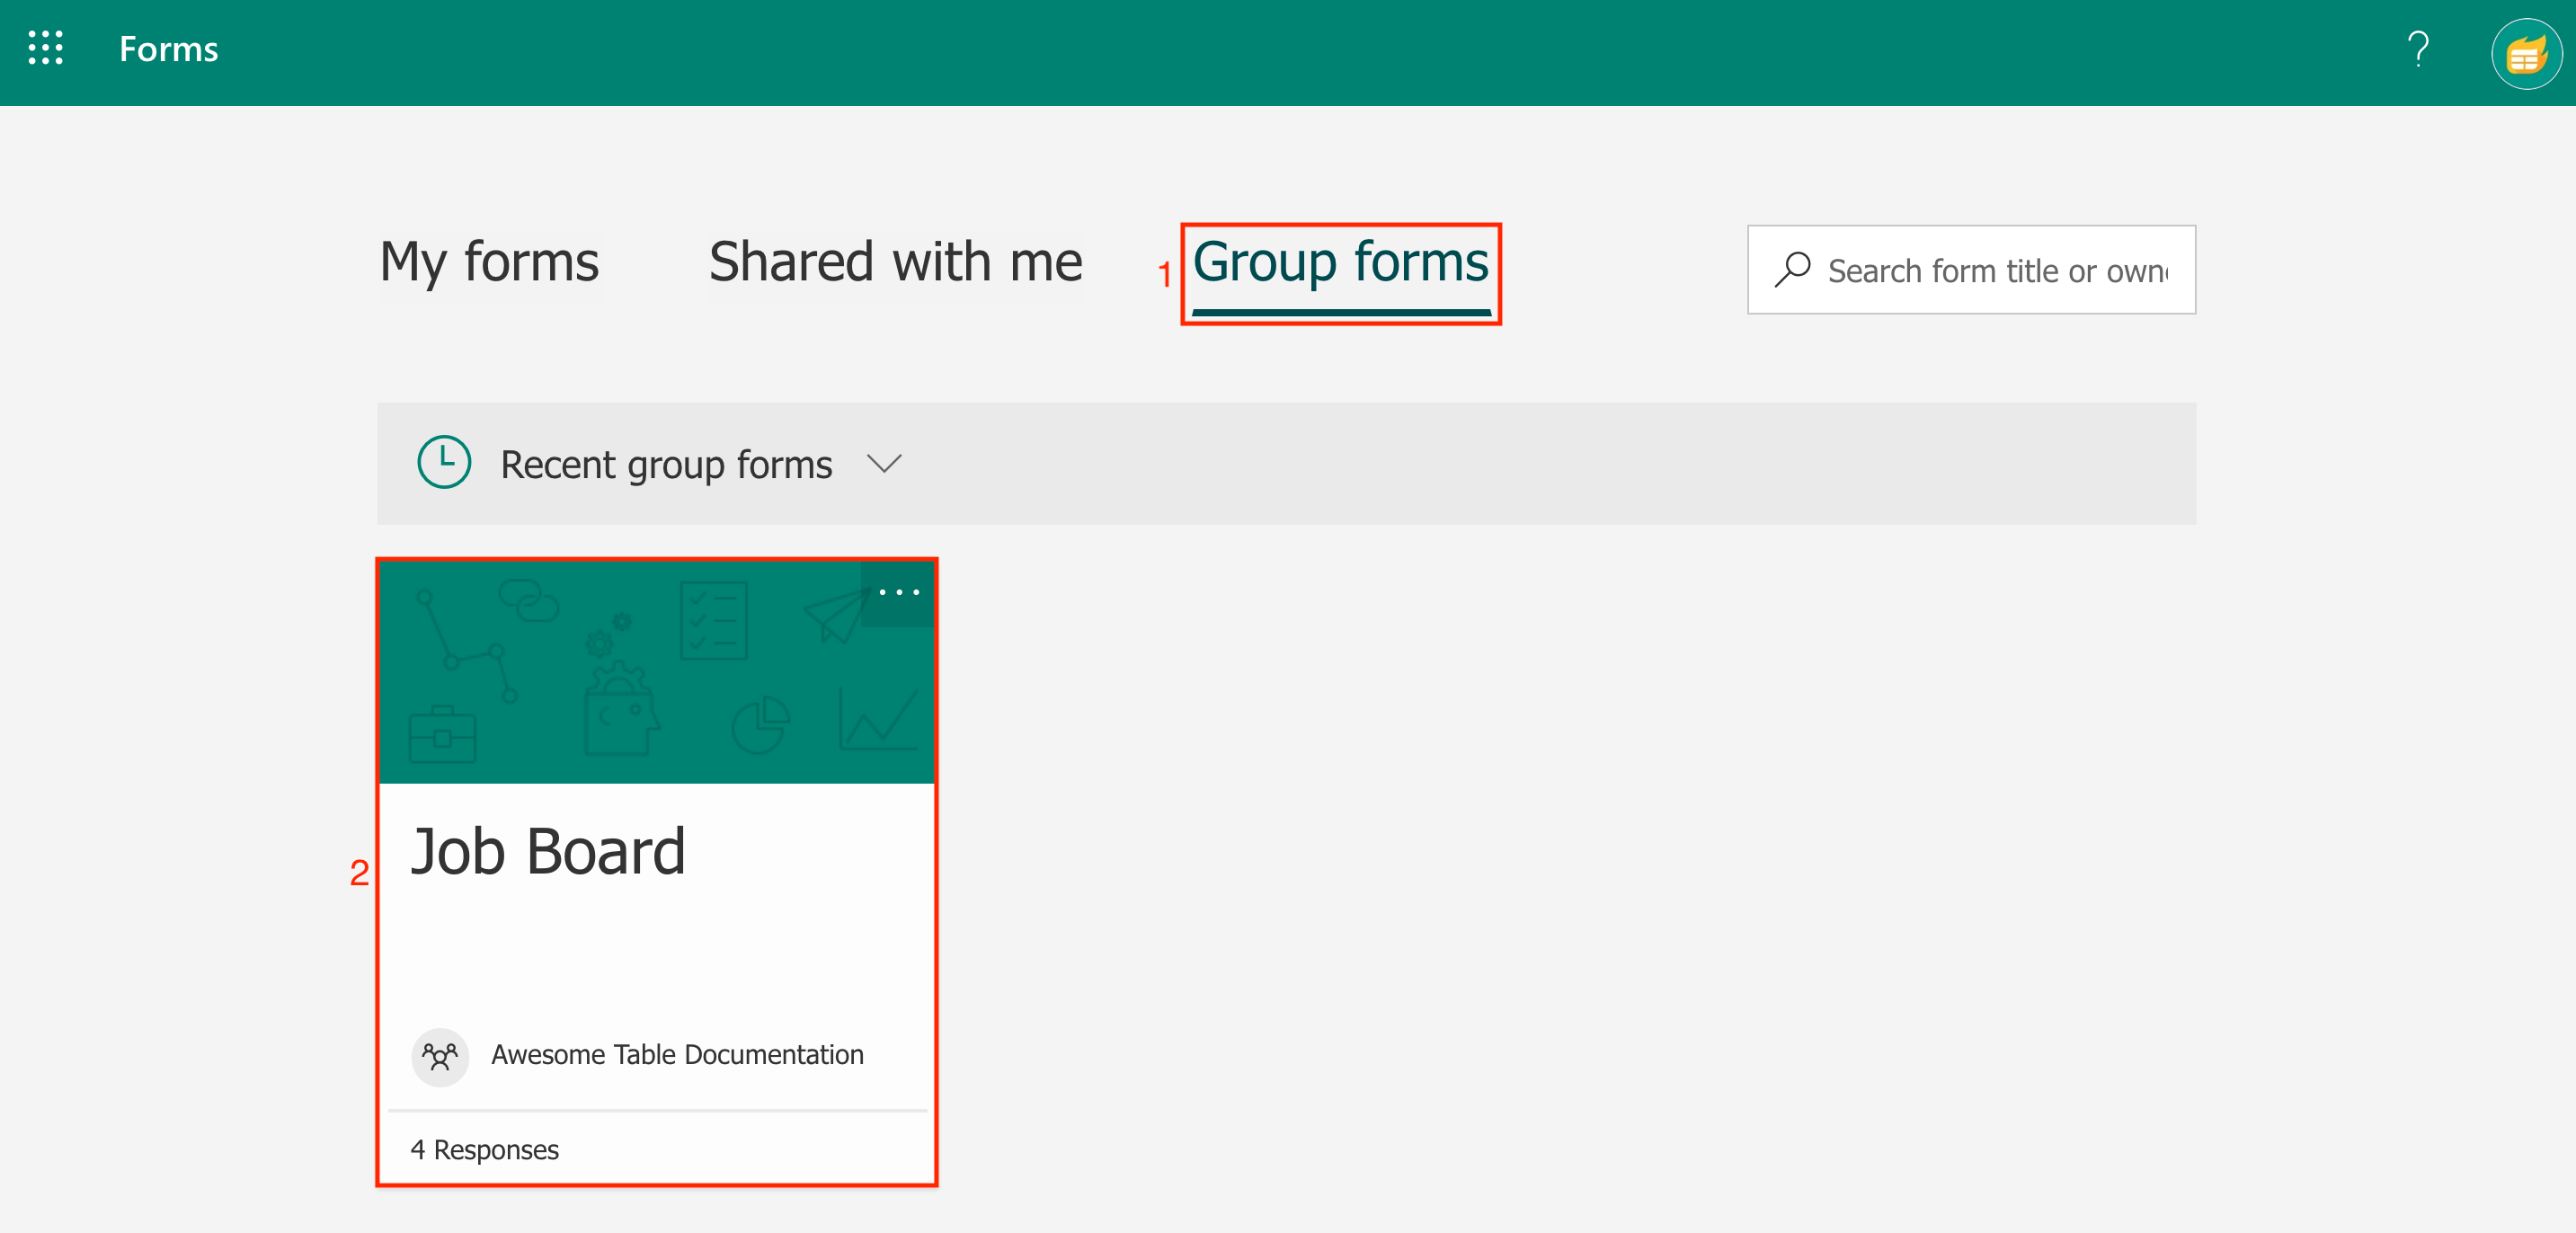
You can also click the Menu icon on the top left corner > All apps > Forms > Group forms.
1. In your OneDrive, click Files > New > Forms for Excel:
2. Enter a name for your Form (i.e: Job Board) > click Create:
A new window opens.
3. Add questions to your Form:
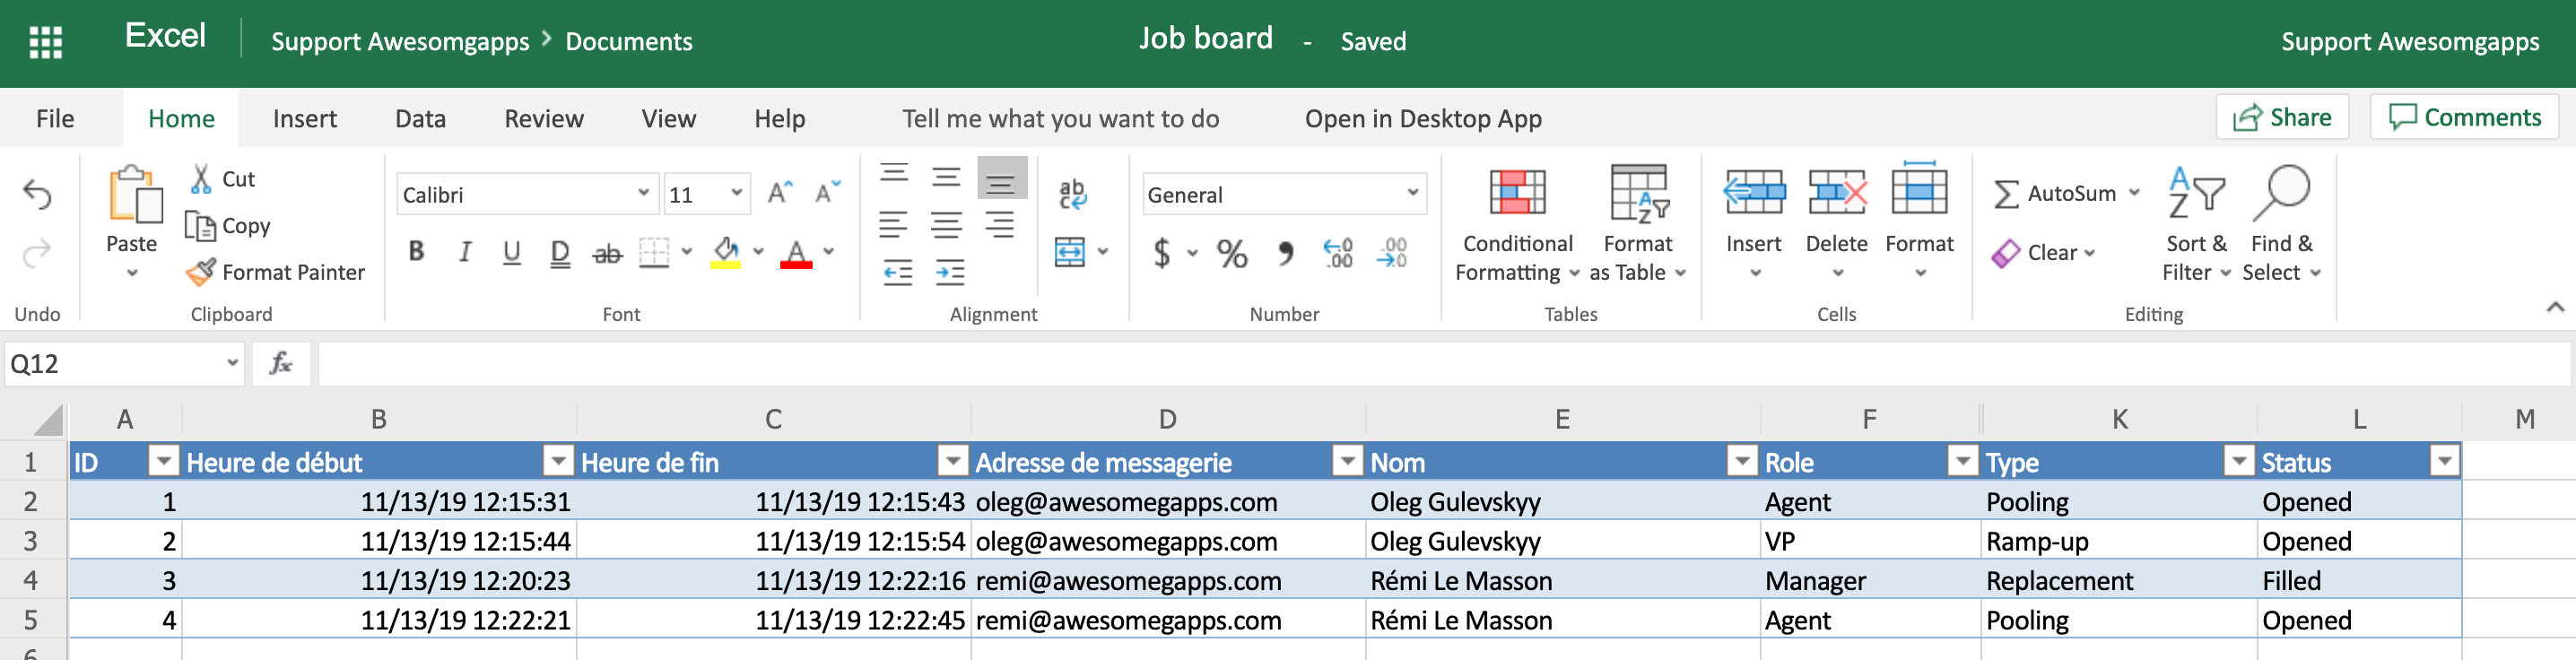
4. To retrieve the responses on an Excel file, go to your form. Click Responses > Open in Excel:
You can also click the Menu icon on the top left corner > All apps > Forms > My forms.

2. Share your Form with respondents
Send and collect responses
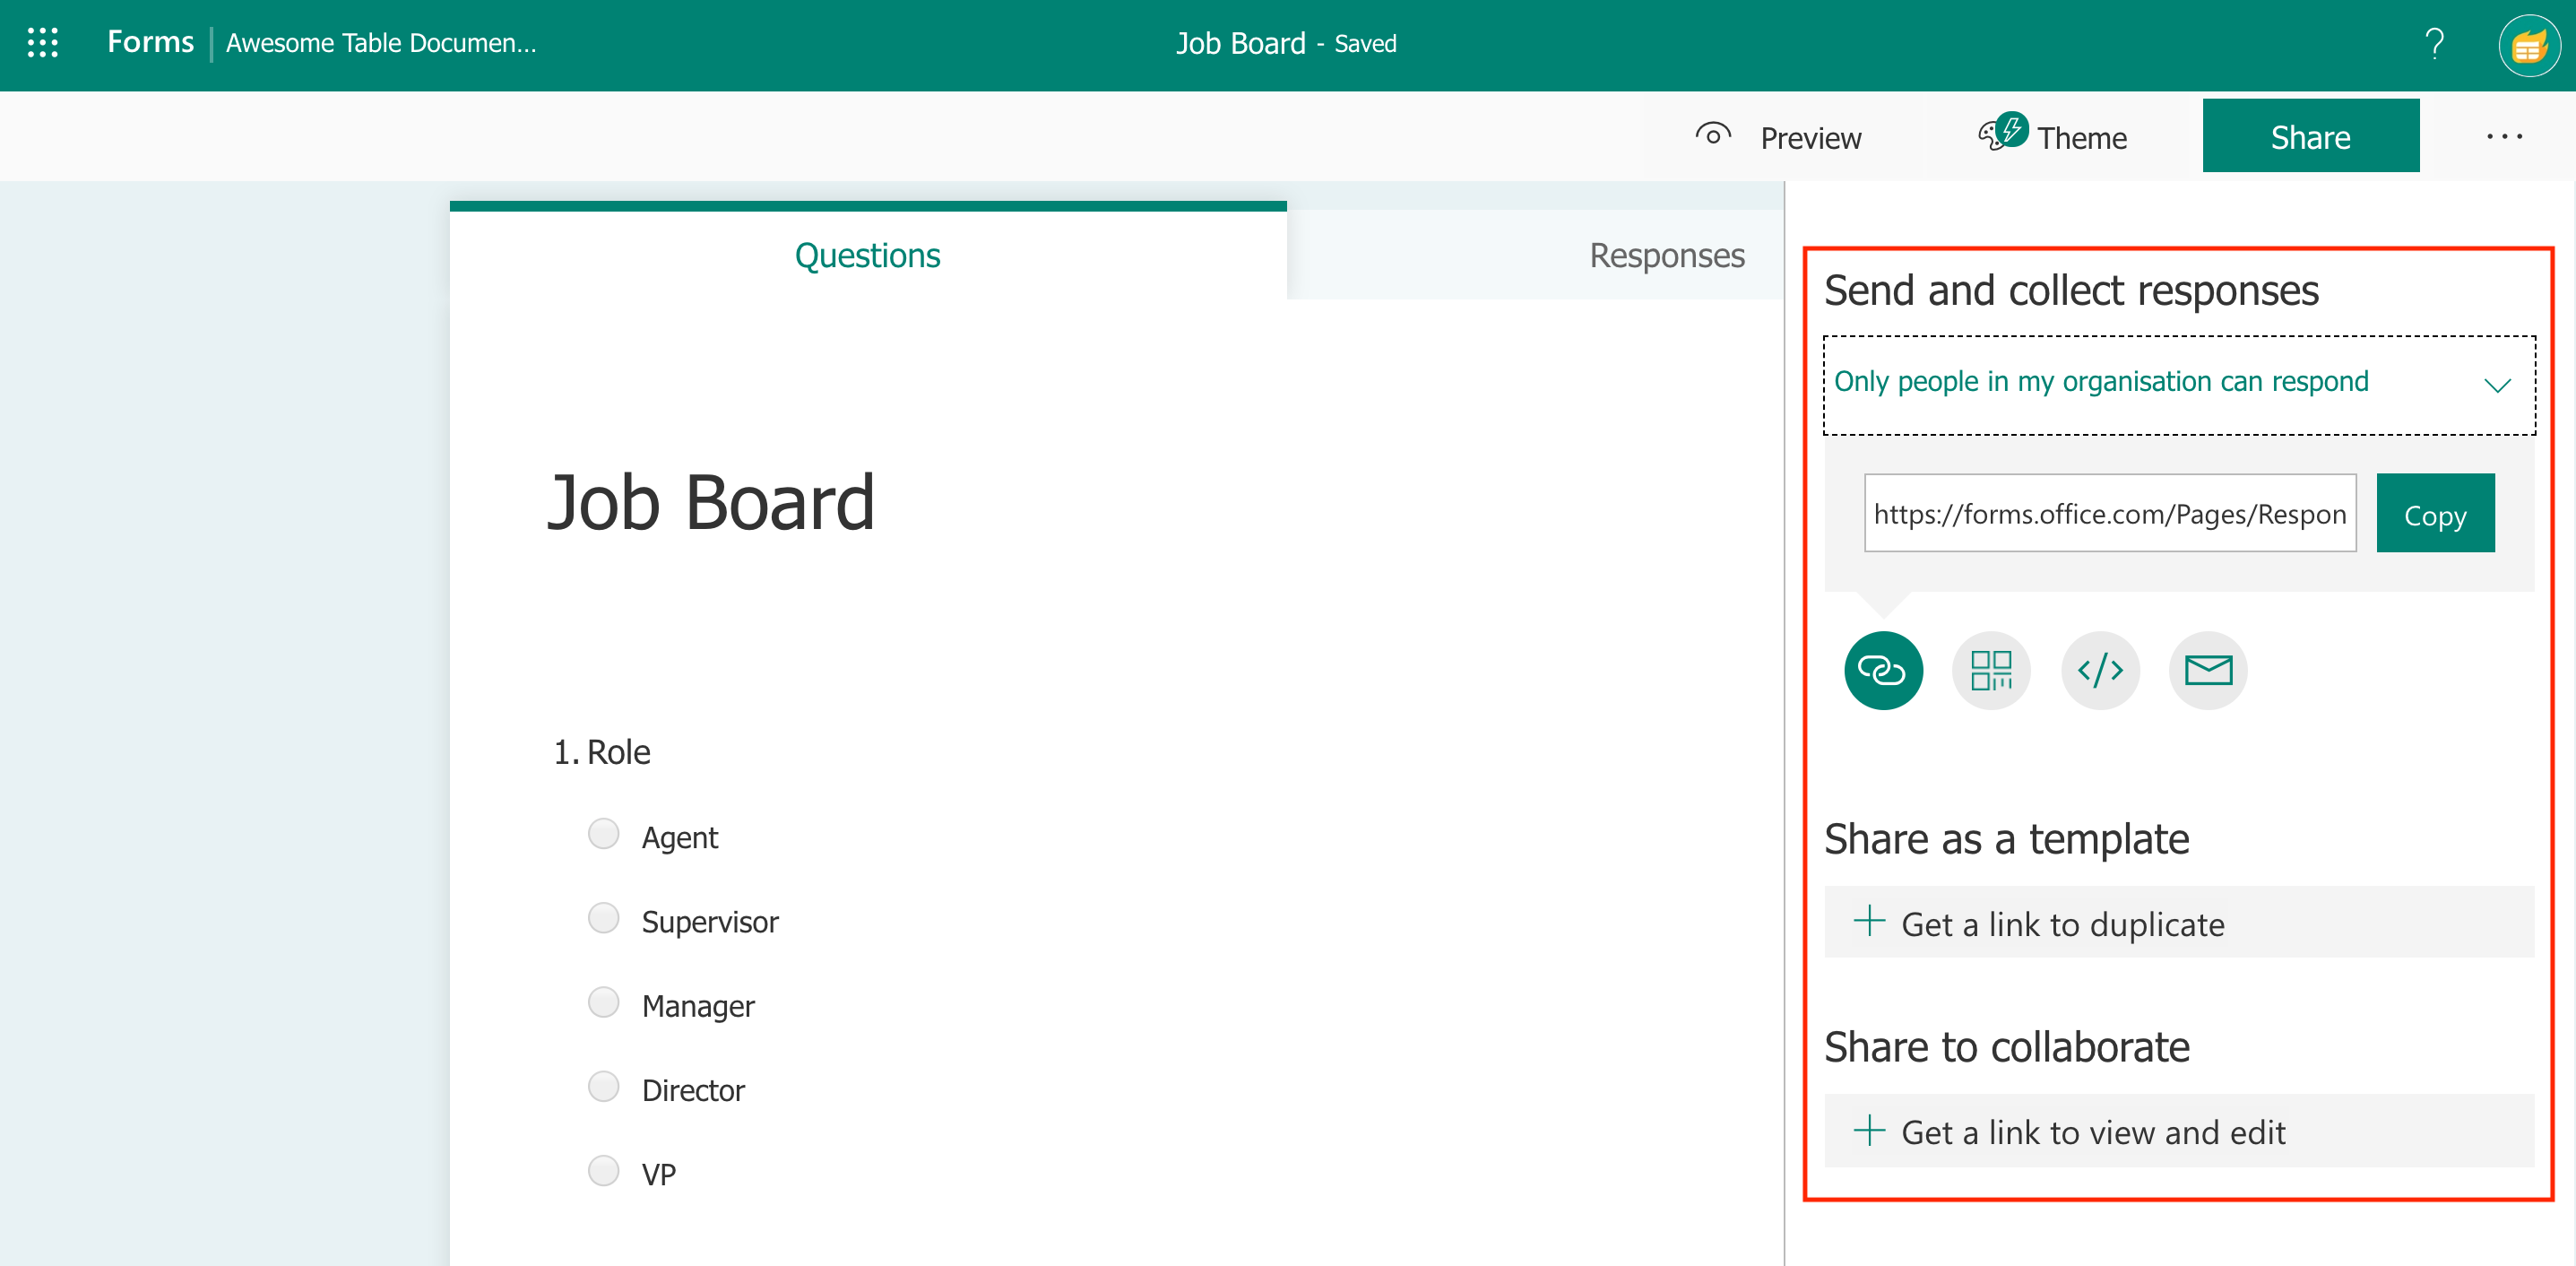
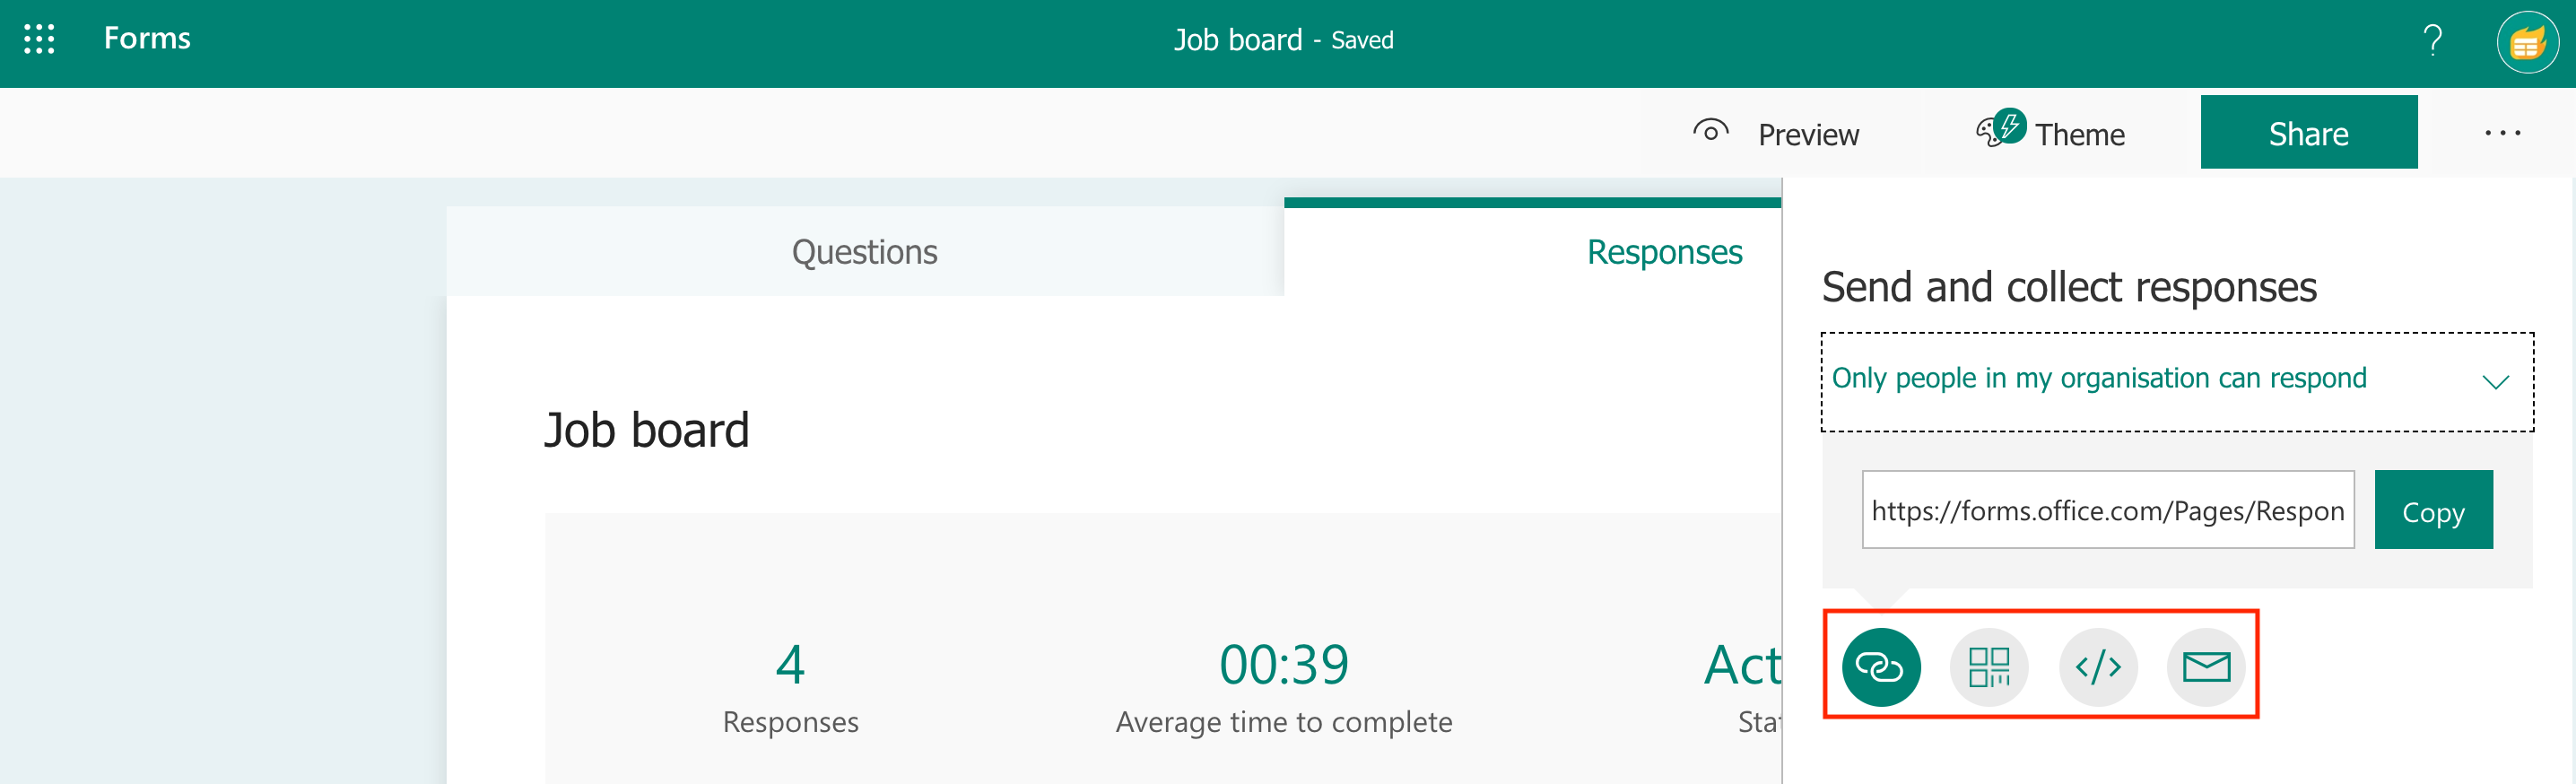
1. On your Form, click Share:

A right sidebar will appear, displaying all your form sharing settings:
2. Select your target: Anyone with the link can respond or Only people in my organization can respond.
3. Choose how to share your form:
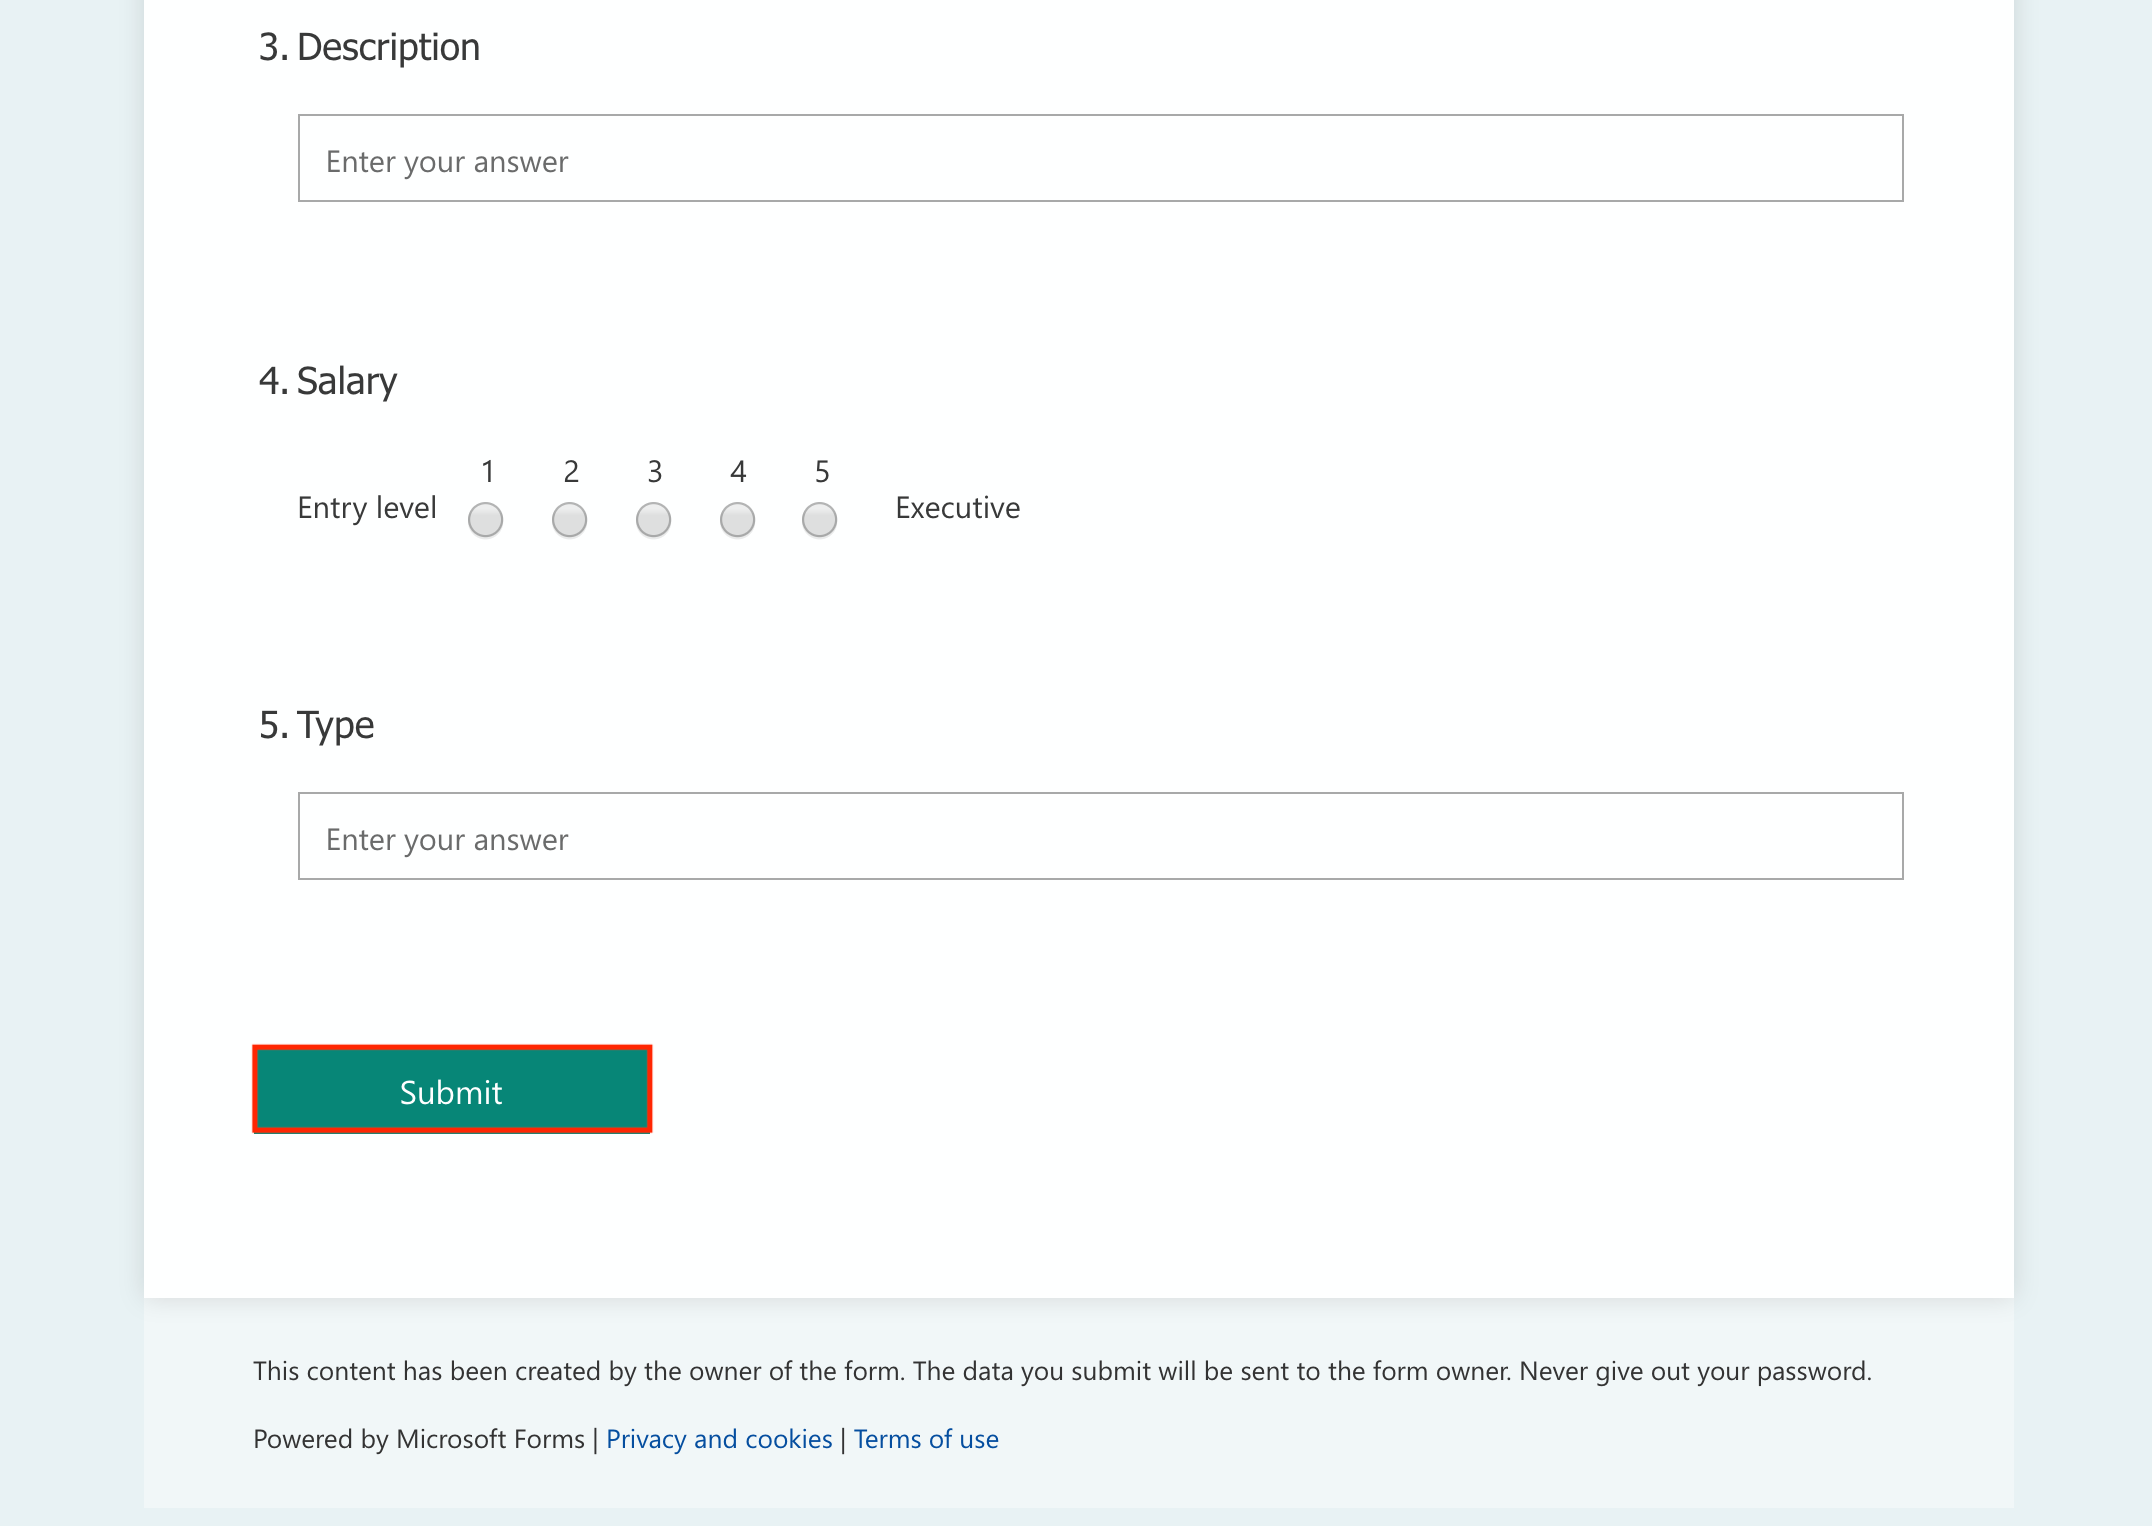
4. Once done, your respondents can submit their answers:
You can then retrieve their answers in the responses Excel file that you’ve created in your SharePoint Documents – learn more: Create your Microsoft Form.
Send and collect responses
1. On your Form, click Share:
A right sidebar will appear, displaying all your form sharing settings:

2. Select your target: Anyone with the link can respond is the default and only option available for sharing your form.
3. Choose how to share your form:

4. Once done, your respondents can submit their answers:

You can retrieve their answers in the responses Excel file that you’ve downloaded from your Form, but do not forget to re-download the file to retrieve the new responses.
3. Set up your Excel file
To know how to set your datasource with headers and keywords, we recommend reading the following: [Part 1] Create and set up your datasource